ACCEPTING APPLICANTS/ENROLLEES
- Students can apply online using pre-enrollment site. To accept student, Go to Applicants shortcut in Desk menu
2. In this list, you can view applicants and select student you want to accept
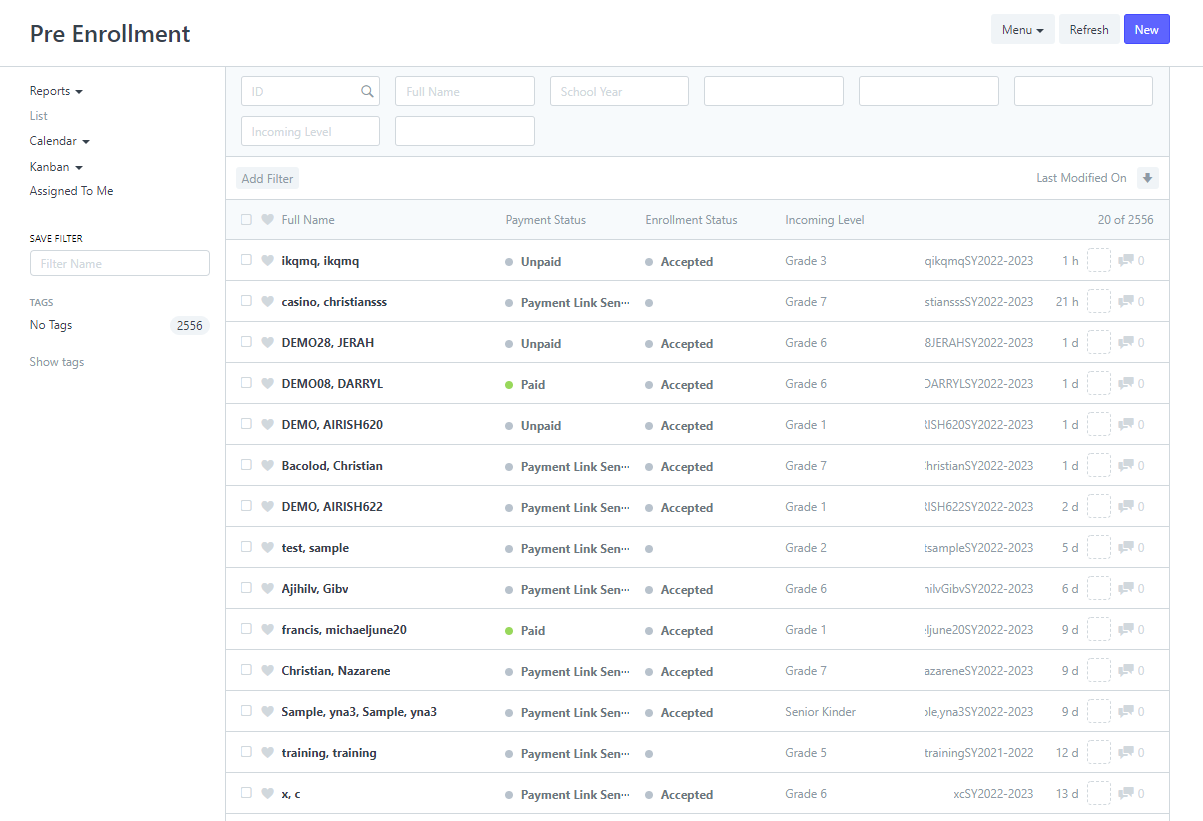
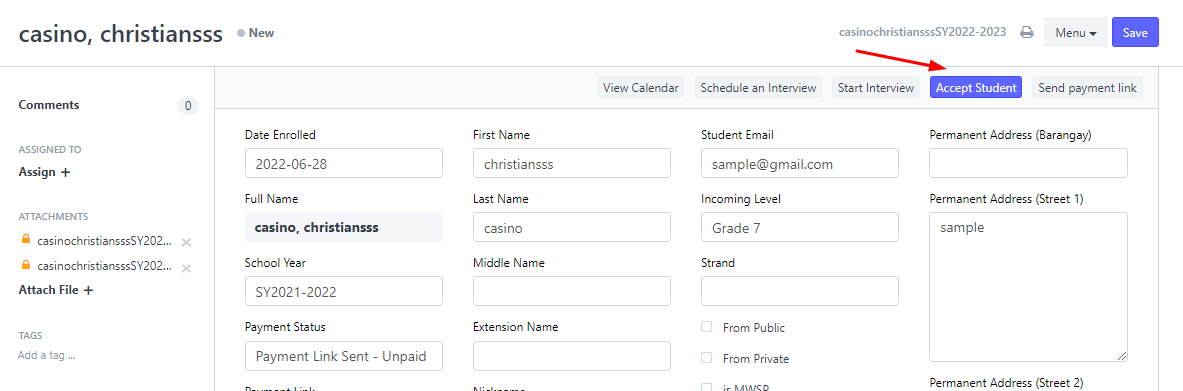
3. Before Accepting student, make sure you read all of student's information including medical records, parent's information etc. Once done review, Click Accept Student above
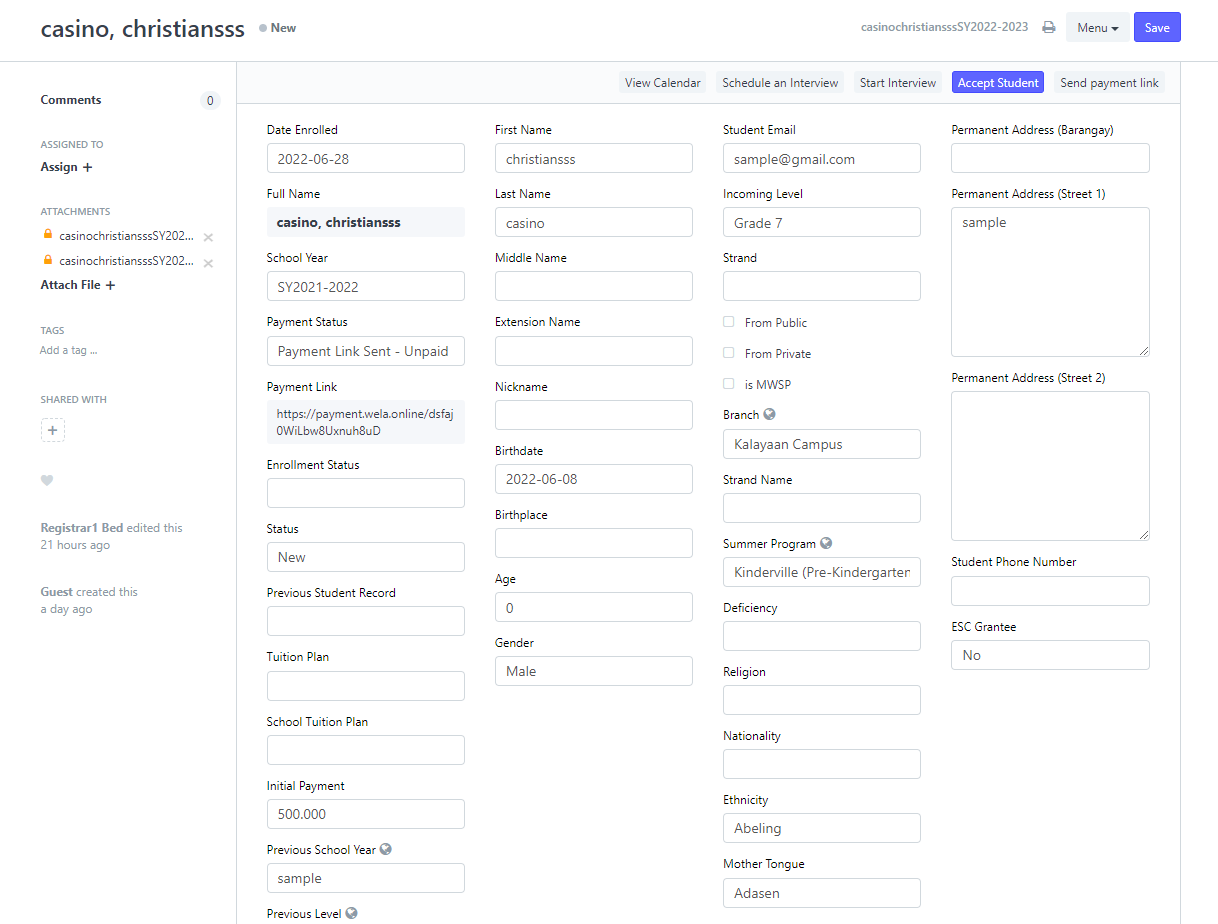
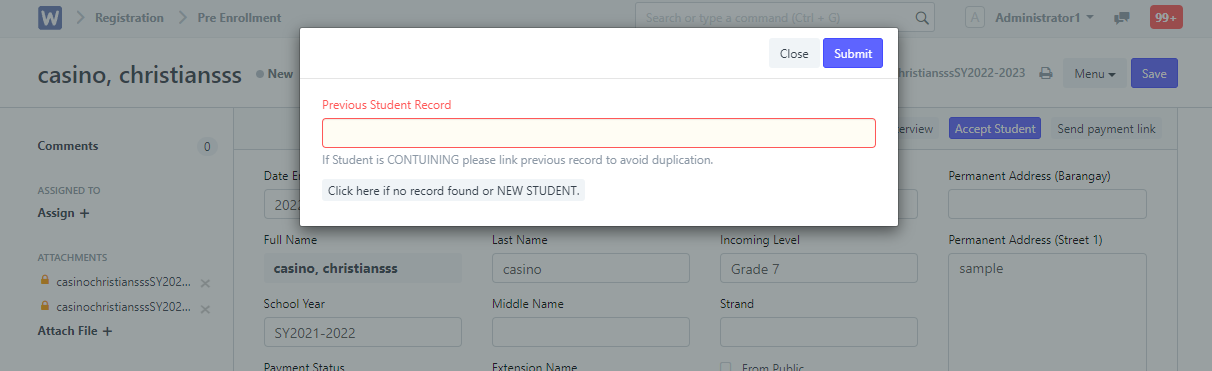
5. In accepting student, you have to identify whether the student is NEW or in Continuing status. You need to provide the previous student record for continuing student to avoid duplication. For NEW students, just click the no record found button to automatically create new enrollee record.
6. Once done accepting, it will redirect you to Enrollees list where you can find student that are accepted and created automatically by the system. If you want some changes or additional information to add, you can add here.
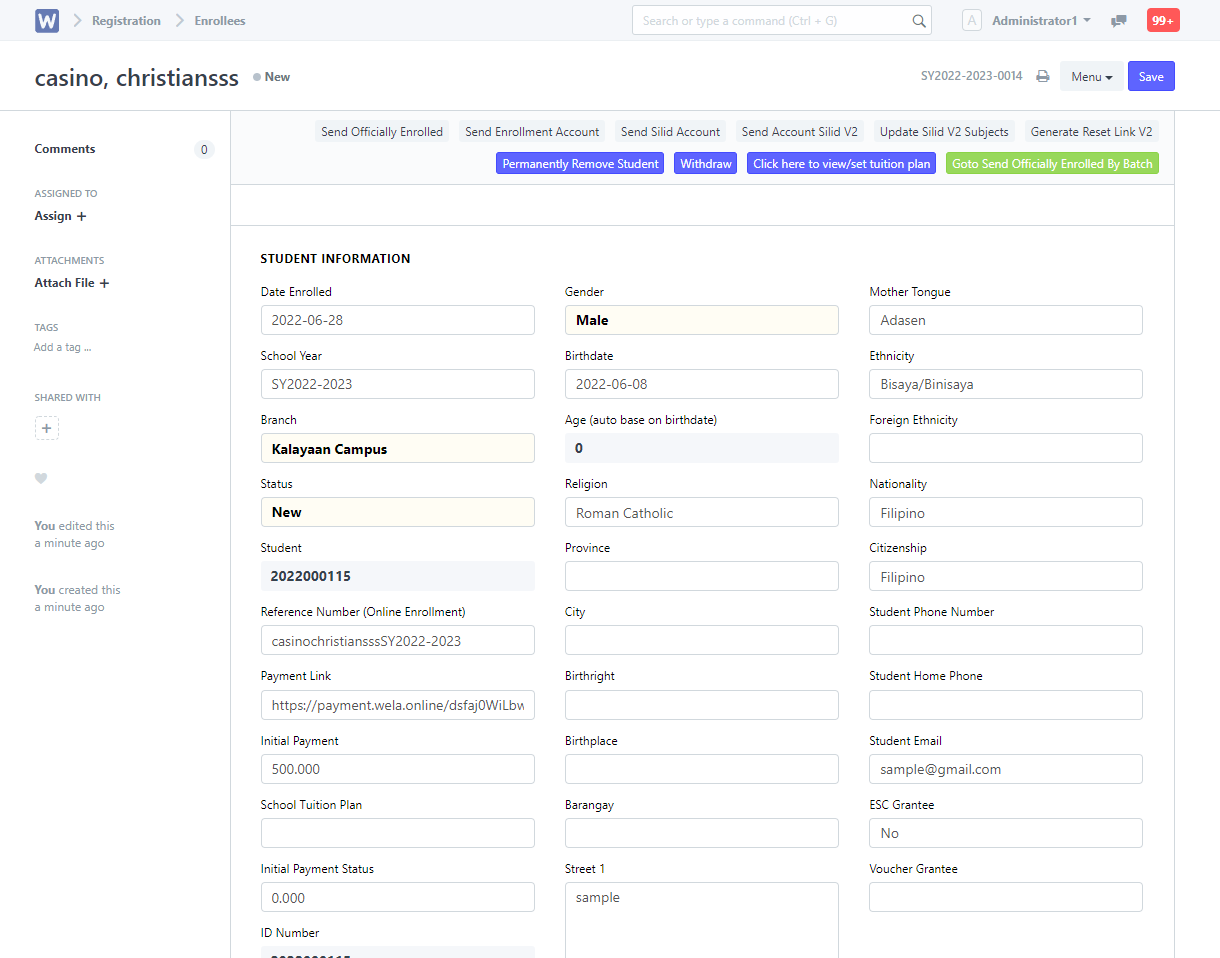
7.Once done or the changes have been made, just Click Save and it will automatically create Enrollee Customer where tuition plans are to set.

SETTING UP SCHOOL FEES AND TUITION PLAN
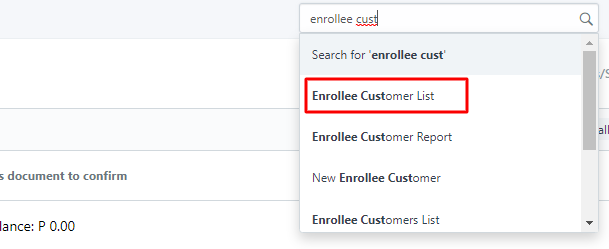
- Go to Enrollee Customer by searching in the search bar or you can also find shortcut in Desk menu
2. Enrollee Customer is automatically created once you enrolled student. In this portion you have to select Tuition Plan based on student's level or Grade he/she's enrolling.
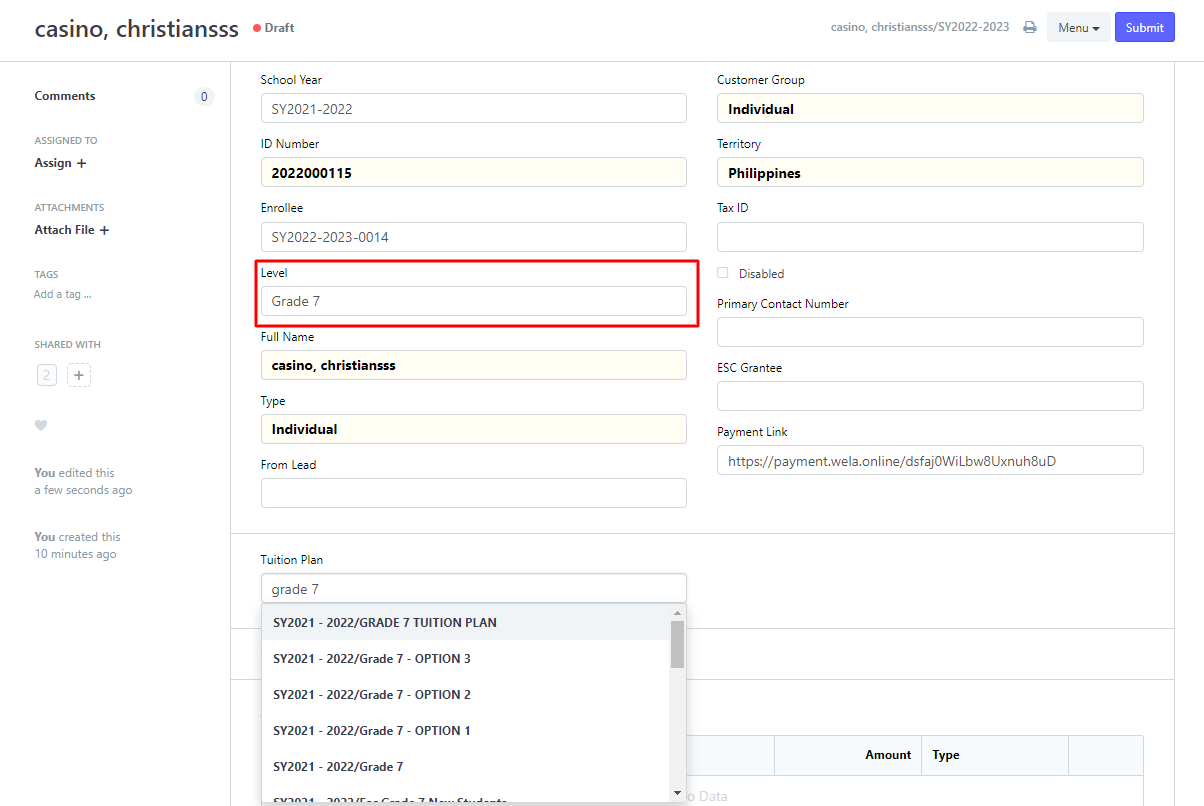
be careful also to look at the school year, it should be identical on tuition plan selected. To setup Tuition plan, go to Setting up Tuition Plan
3. Once done assigning tuition plan, it will automatically create breakdown fees and schedule based on selected tuition plan.
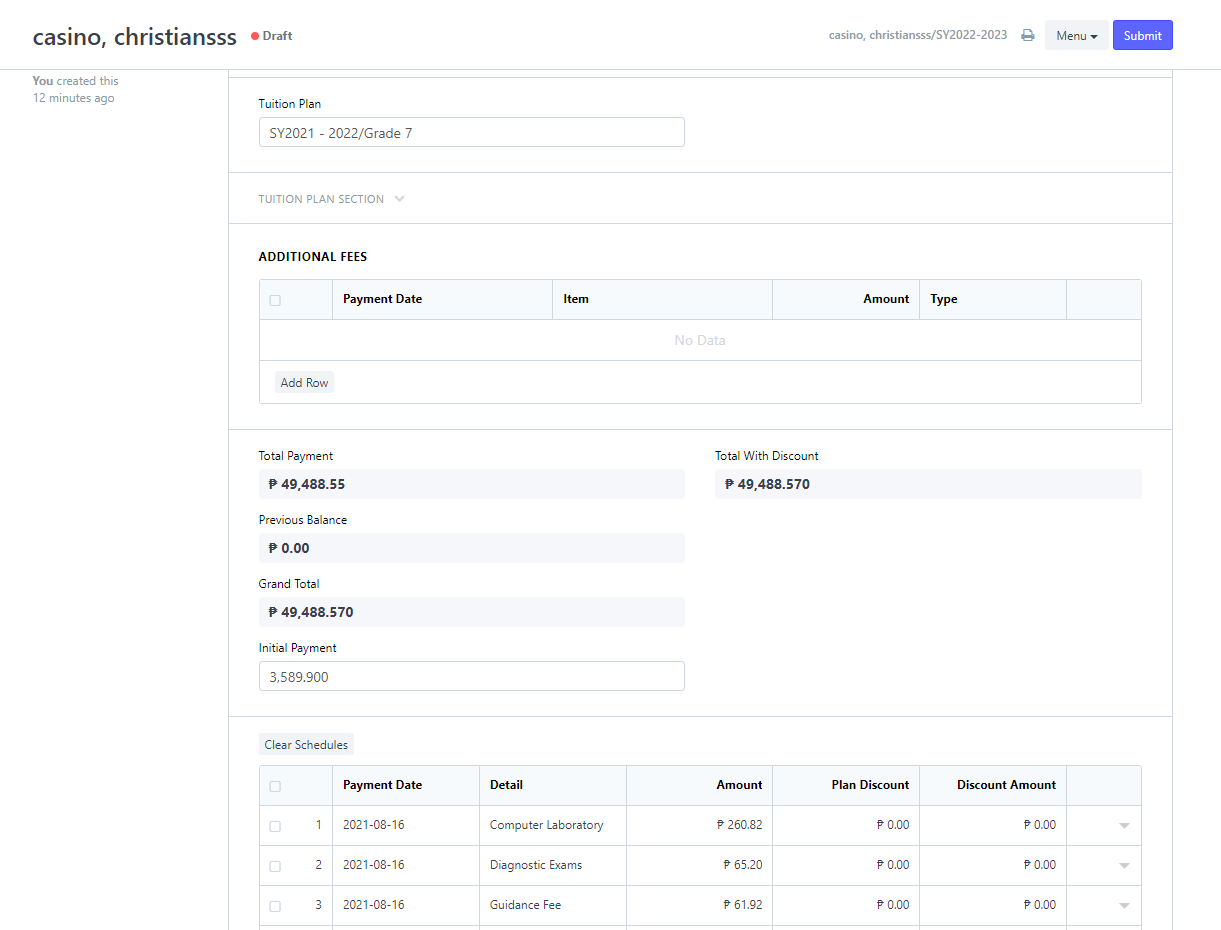
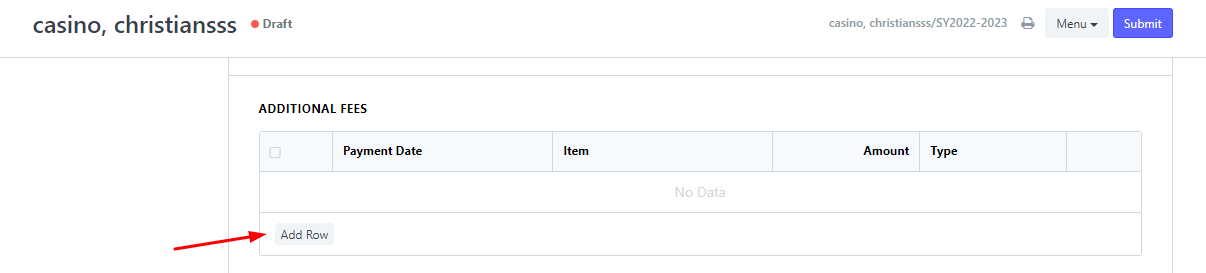
You can also add Additional Fees if you want to charge other items/fees to the student. Just click Add Row in Additional Fees section
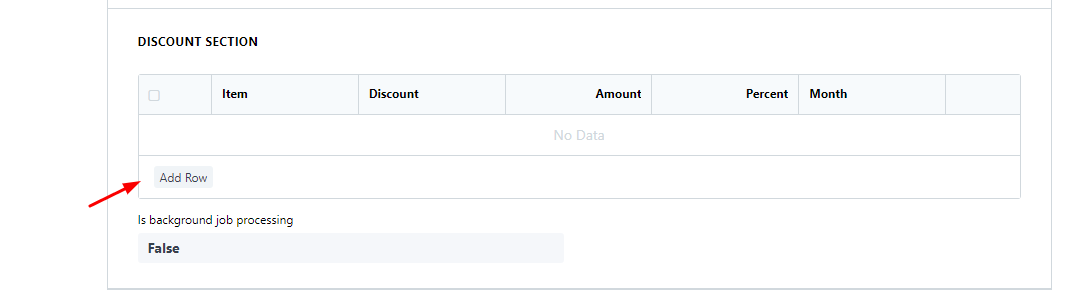
You can also add Discounts if you want to give discount to a student. Just Click Add row in Discount Section and select items or fees and provide discount if its in Fixed Amount or in Percentage
4. Once done, just submit the Enrollee Customer form. It will prompt send payment link to parent for them to settle their child's payment online.
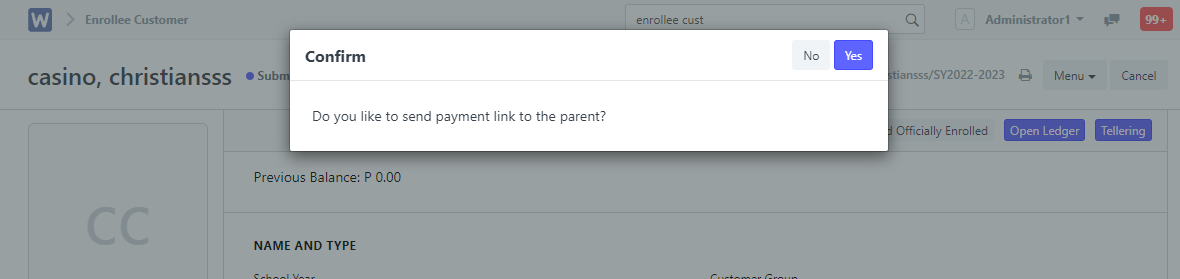

Indicator that the form is successfully submitted.
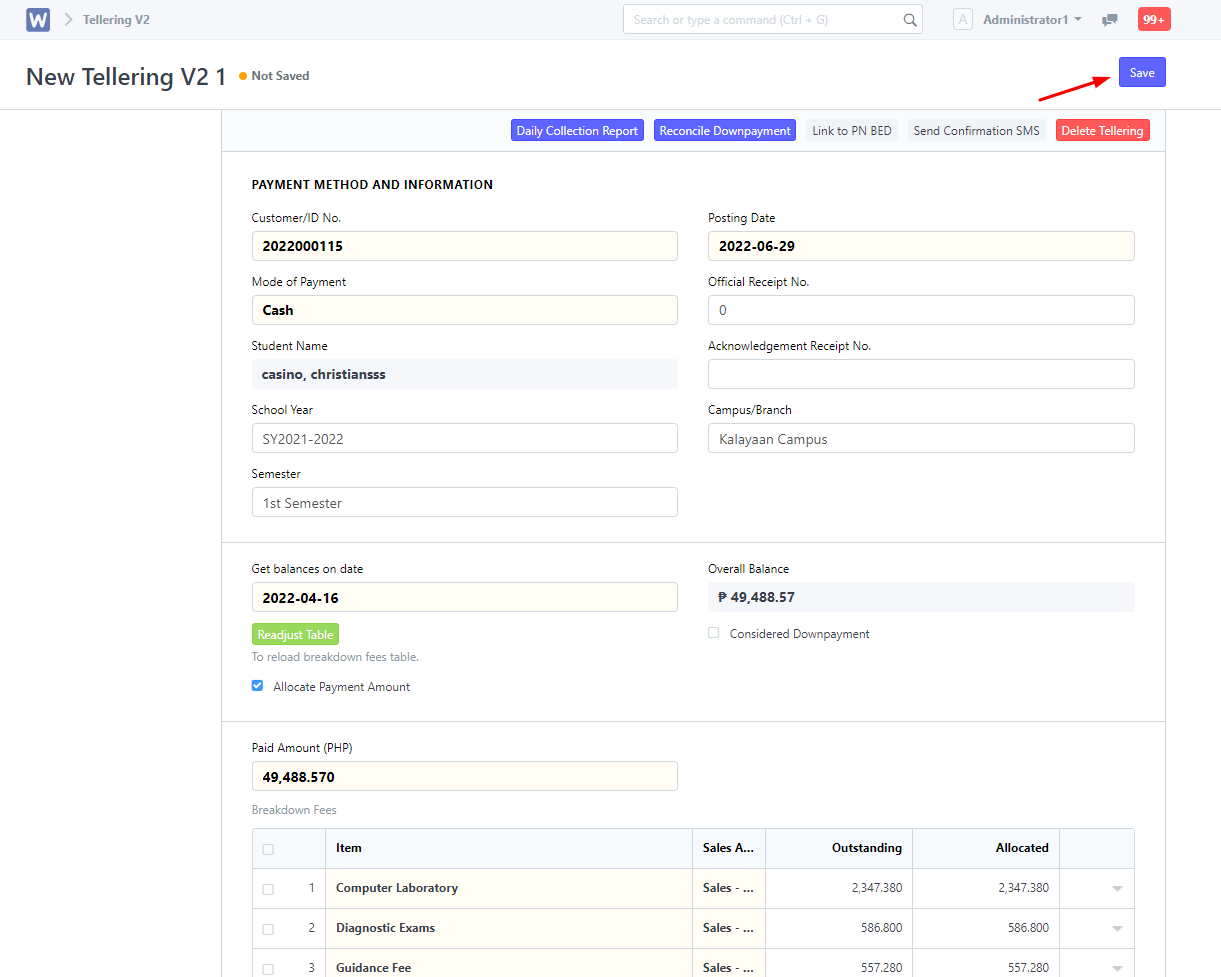
PROCESS PAYMENTS/TELLERING
- In Enrollee Customer, you just have to click the Tellering button for you to redirect to tellering to process payments

2. In Tellering form, you just have to provide the student's ID number for you to settle payment and the Paid Amount, Balances and Breakdown fees will automatically load in the form
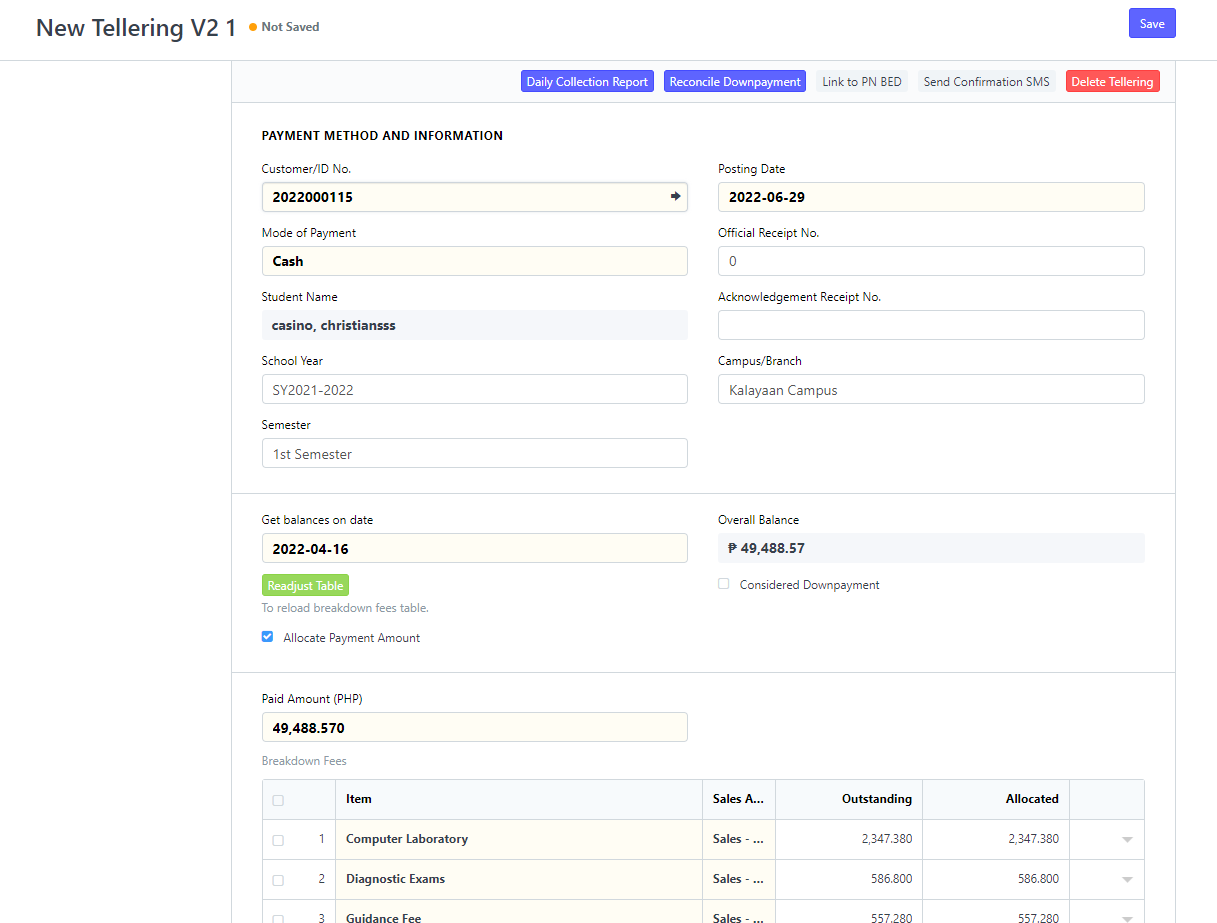
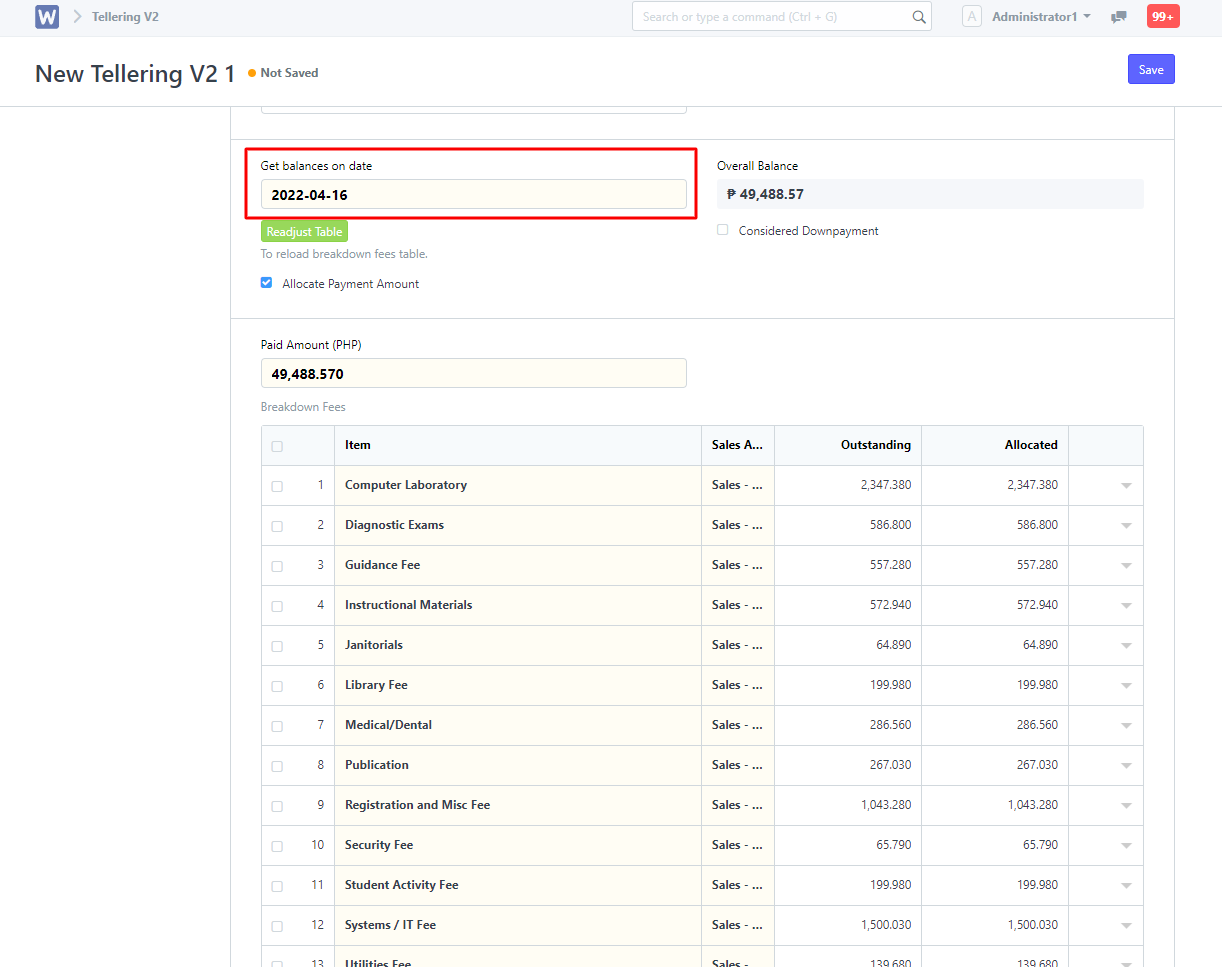
3. You can set the get balances on date for you to get all payments whether it is a monthly payment or annual payment. Paid amount, overall balance and breakdown fees will auto calculate.
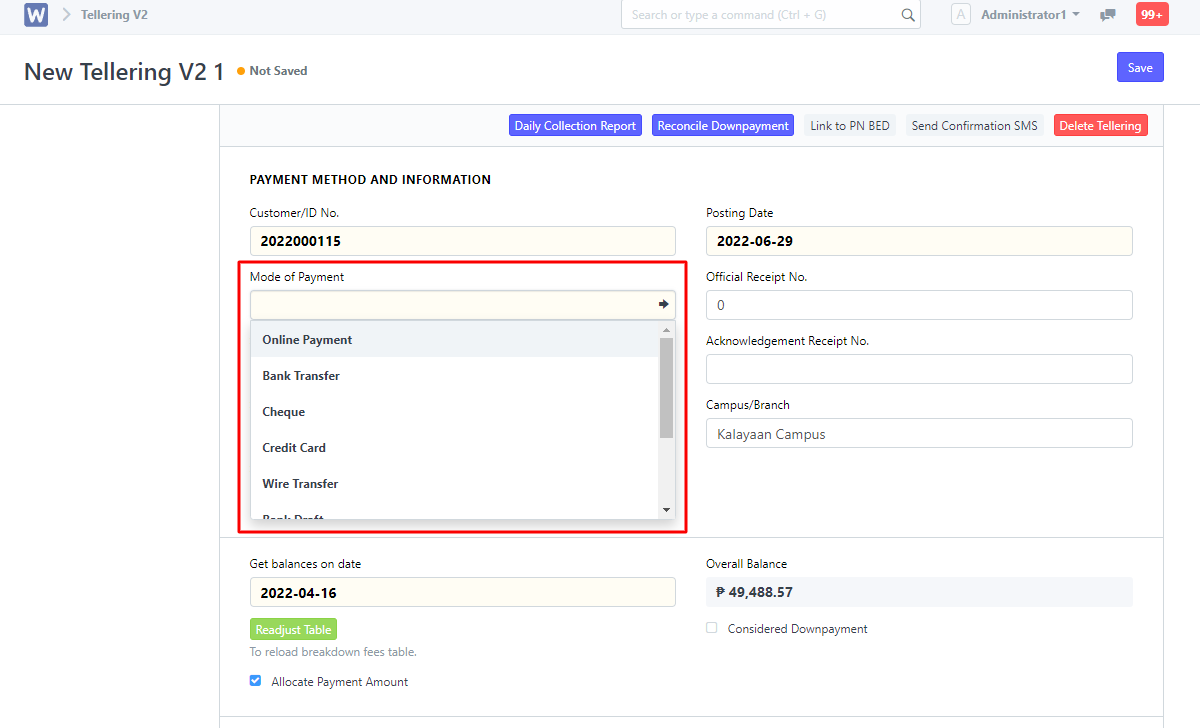
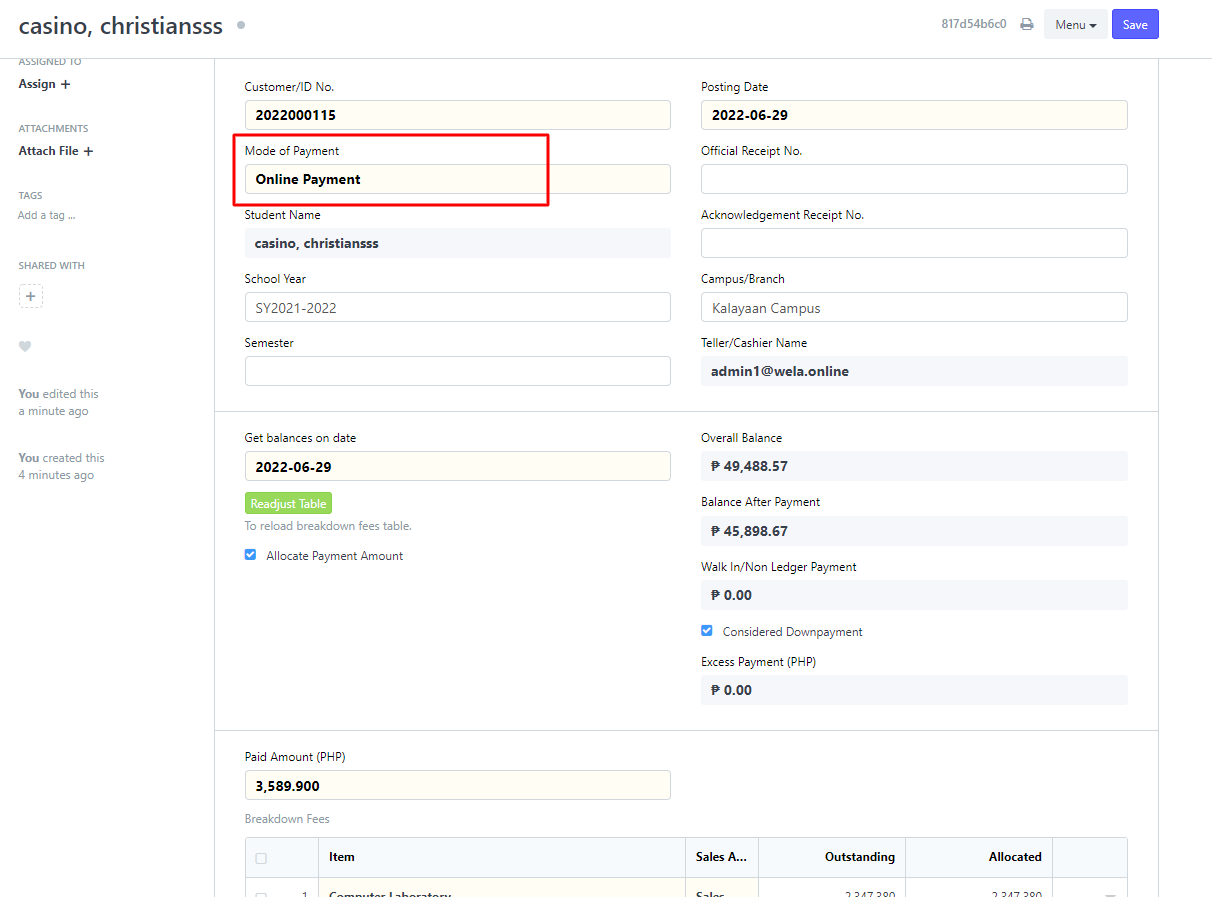
4. Next, you can also modify Mode of Payment depends on what is being process physically if its a Cash, Cheque, Bank Transfer etc
5. Once done settling payment, just Click Save button. No need for the submit
Note: Online payment process are automatically created tellering records and auto allocate payments. No need for you to create one for online payment
PROCESS ONLINE PAYMENTS
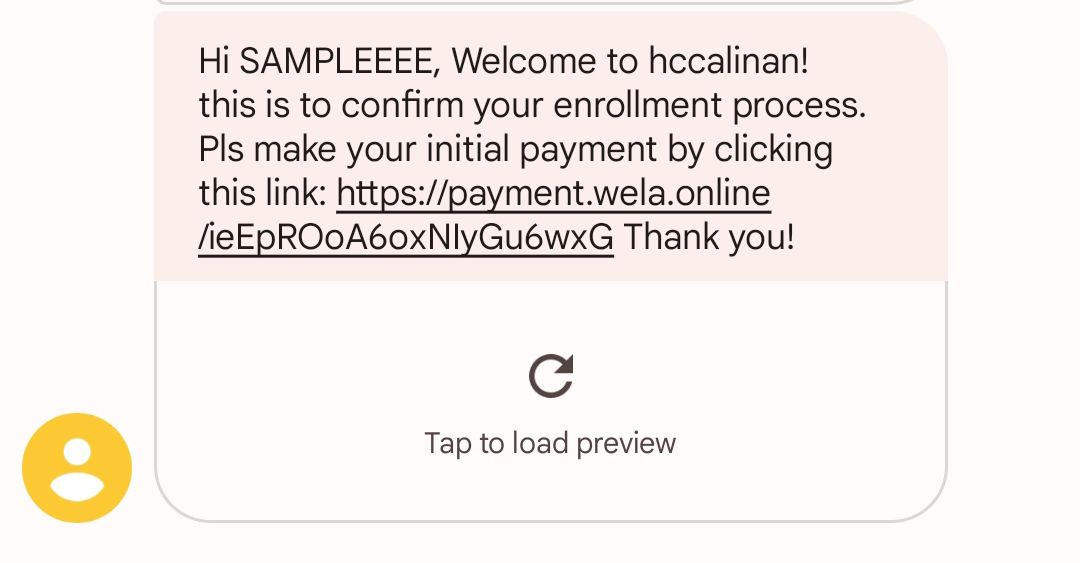
- In Enrollee customer, just click yes after submission for the parent will receive an online payment link to process payments

2. In the parent part they will receive a text message as shown below. They just have to click the payment link to process payments
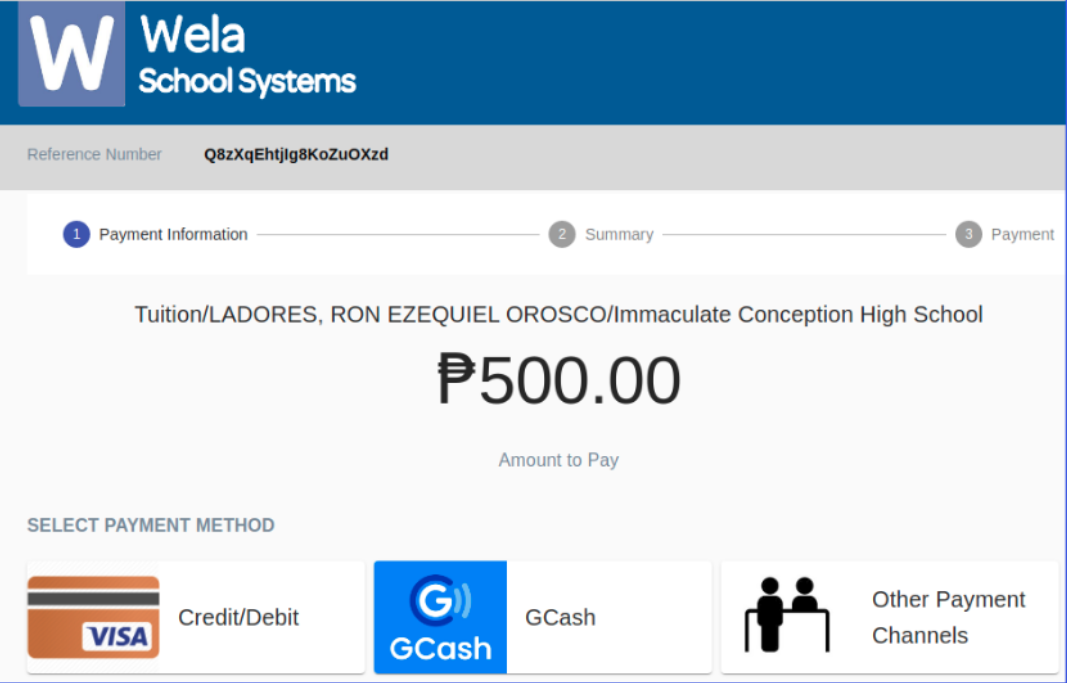
3. In the link provided, there will be a list of payment channels or different payment method to able to settle initial payments or balances
4. Once the parent settle payment, it will provide payment link here in Enrollee Customer
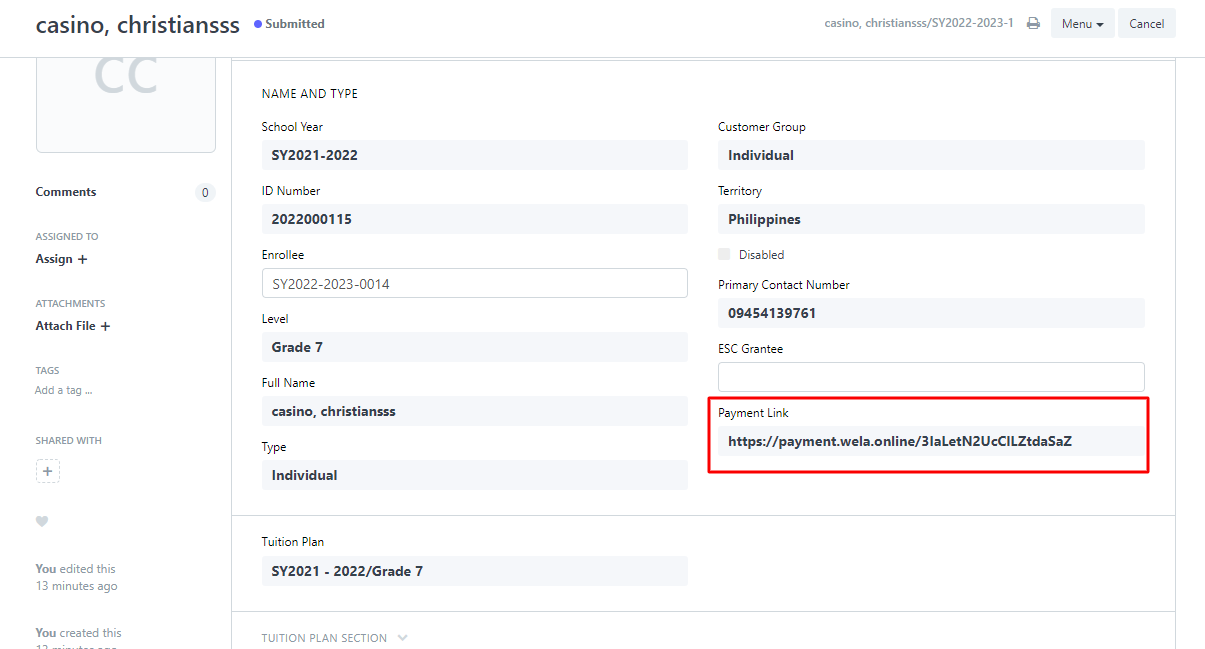
and also, online payments will automatically create tellering process indicated mode of payment Online Payment since it was processed online
CHECKING ENTRIES/REPORTS
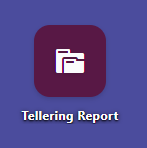
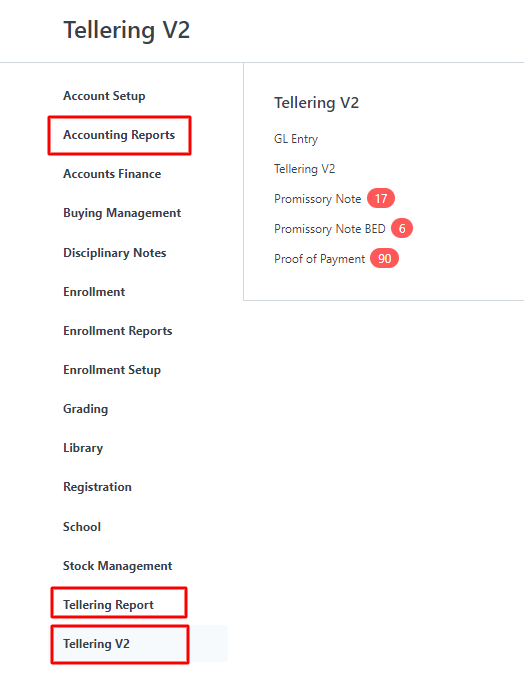
- For checking payments, balances, receivables etc. Go to Tellering Reports in Desk Menu
2. You can find here different reports to check student balances and payments
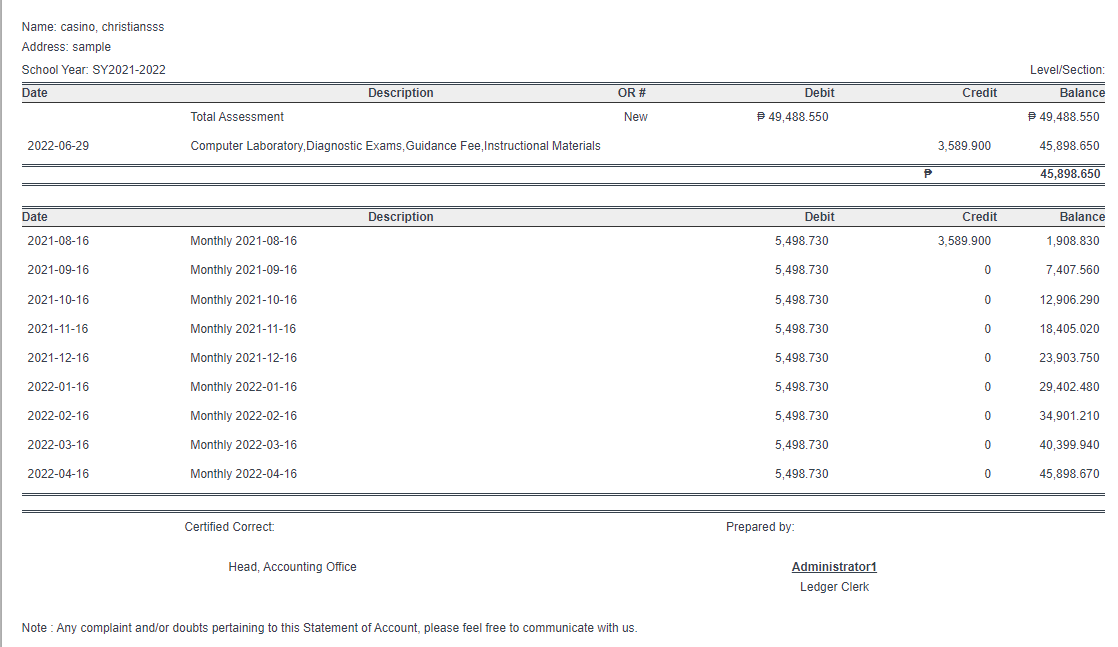
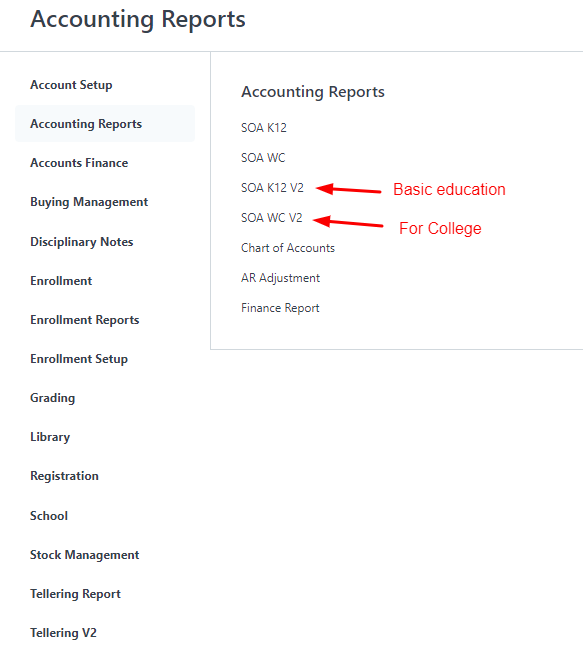
VIEWING STATEMENT OF ACCOUNT
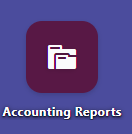
- For this matter, kindly Go to Accounting Reports in Desk Menu
2. Click SOA K12 V2 Report for Basic Education Statement of Account
3. Kindly provide Student ID number and Student School Year for the Statement of Account to load
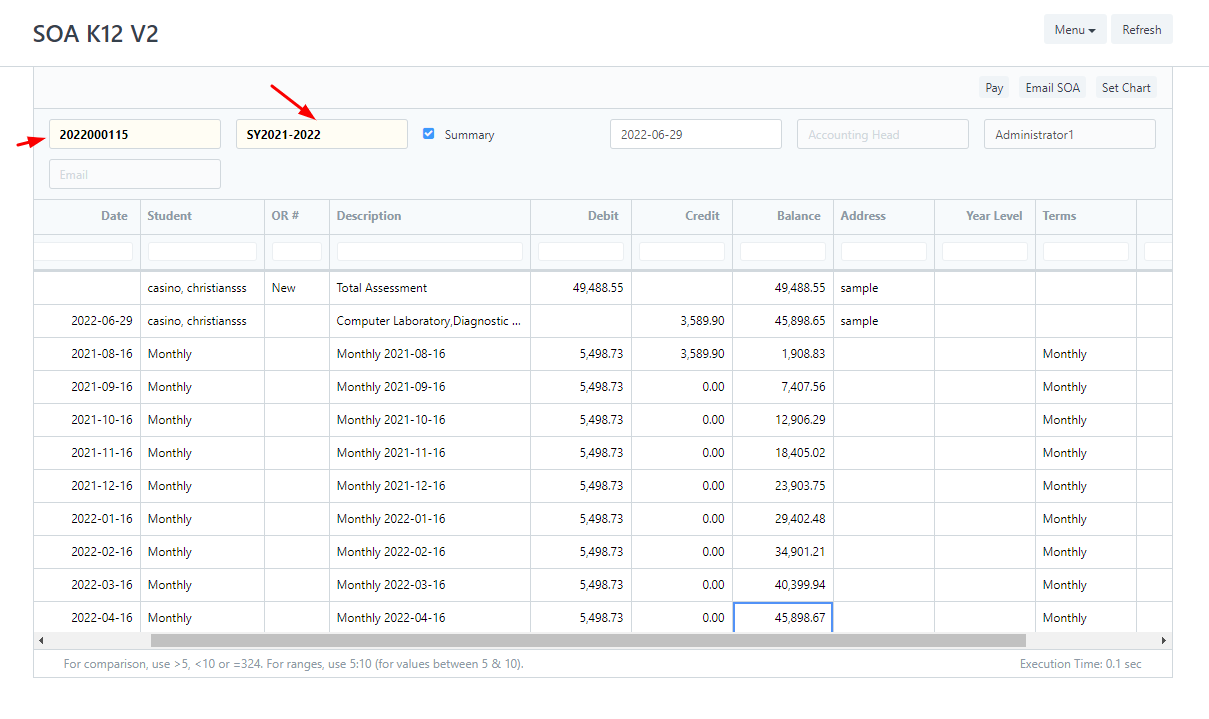
4. It will now display the payments settled, fees and balances of the student. You can also print the Statement of Account by clicking the Menu button and Select Print on the list

5. You can now provide a hard copy Statement of Account to your student/parent if needed.