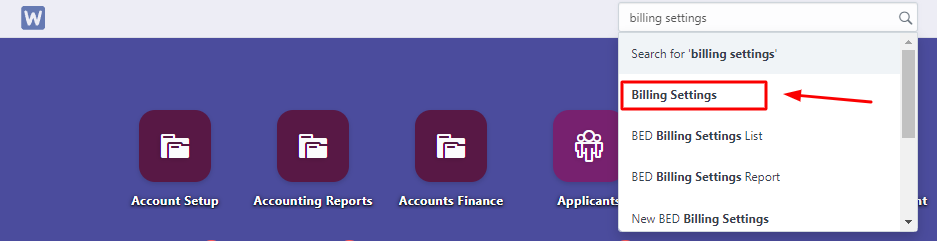
- To process payment, Lets setup first the options to be set so that the new Tellering v2 will appear. You can go to Billing Settings first by searching it in the search bar in Wela
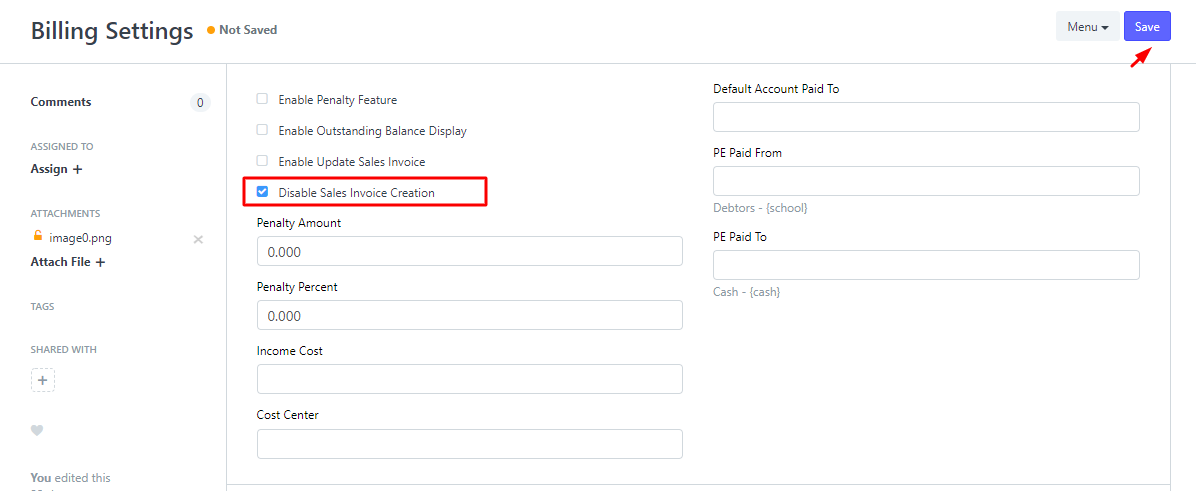
2. While you're in Billing Settings Form, kindly check Disable Sales Invoice creation and hit Save. This means that you are can now input fees without making invoice
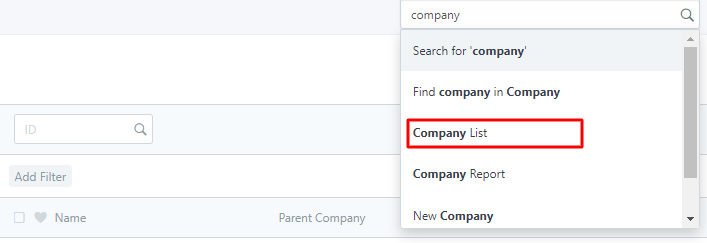
3. After setting up the Billing Settings, Go to Company list to setup the default accounts needed. This is also important in order for you to produce General Ledger report for every student
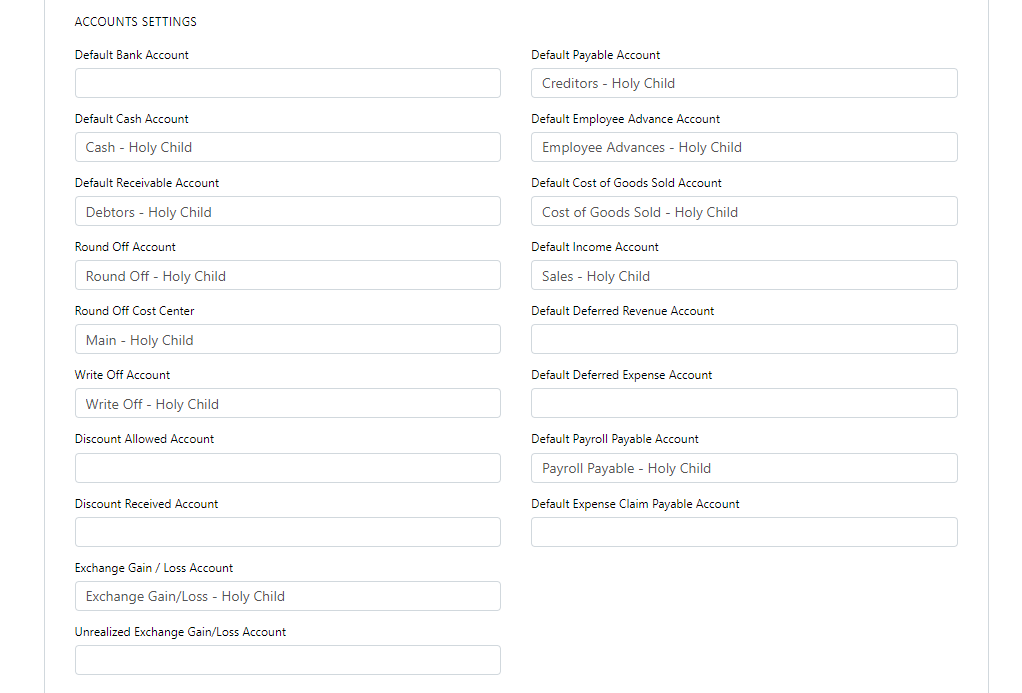
4. In the Company settings, setup the right account for each default account type. Once done, hit Save
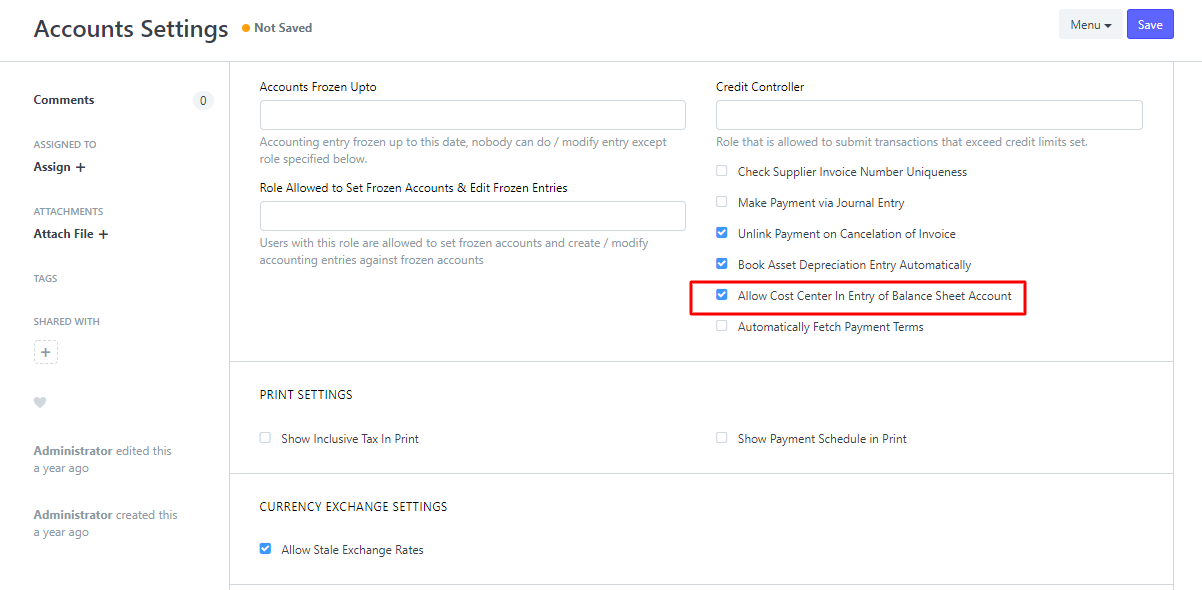
5. Next, Go to Account Settings for the Cost Center. This is also important so that every payment transaction will create GL Entry report and also will display General Ledger report for entry/transaction checking. Once done check Allow Cost Center in Entry, hit Save
6. Once done setup, you can now redirect to Tellering v2 once you process payments. From Matriculation you can find Tellering button here for easy access. Just Click the button and it will redirect you to Tellering V2 form
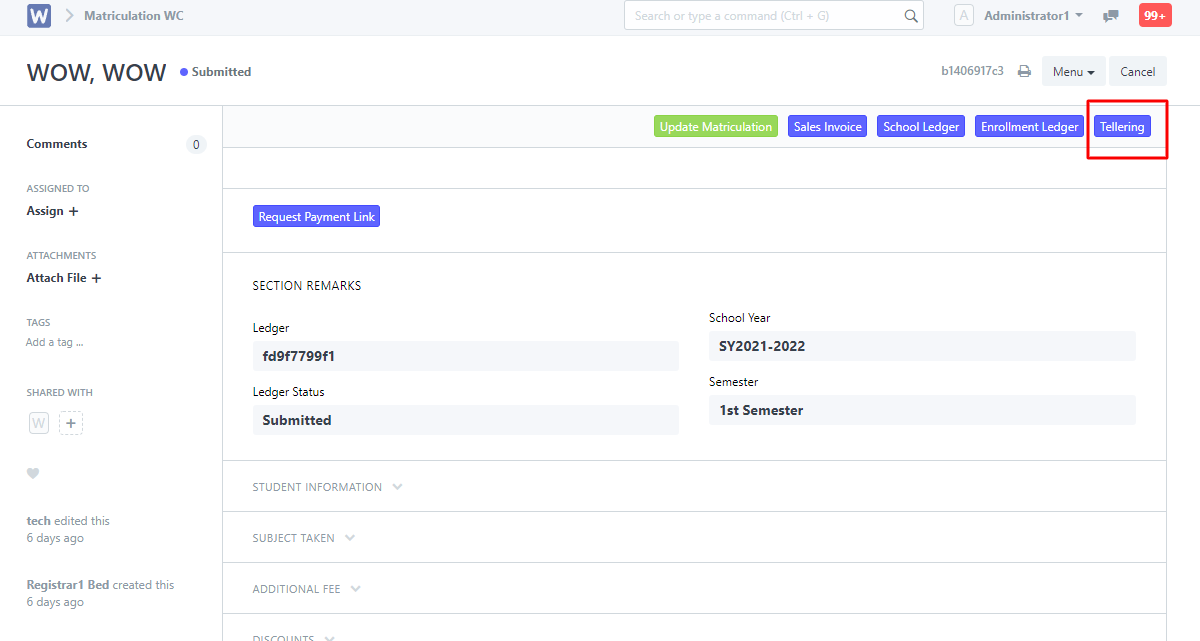
You can also see shortcuts Tellering v2 in Desk mode or even type Tellering V2 in search bar
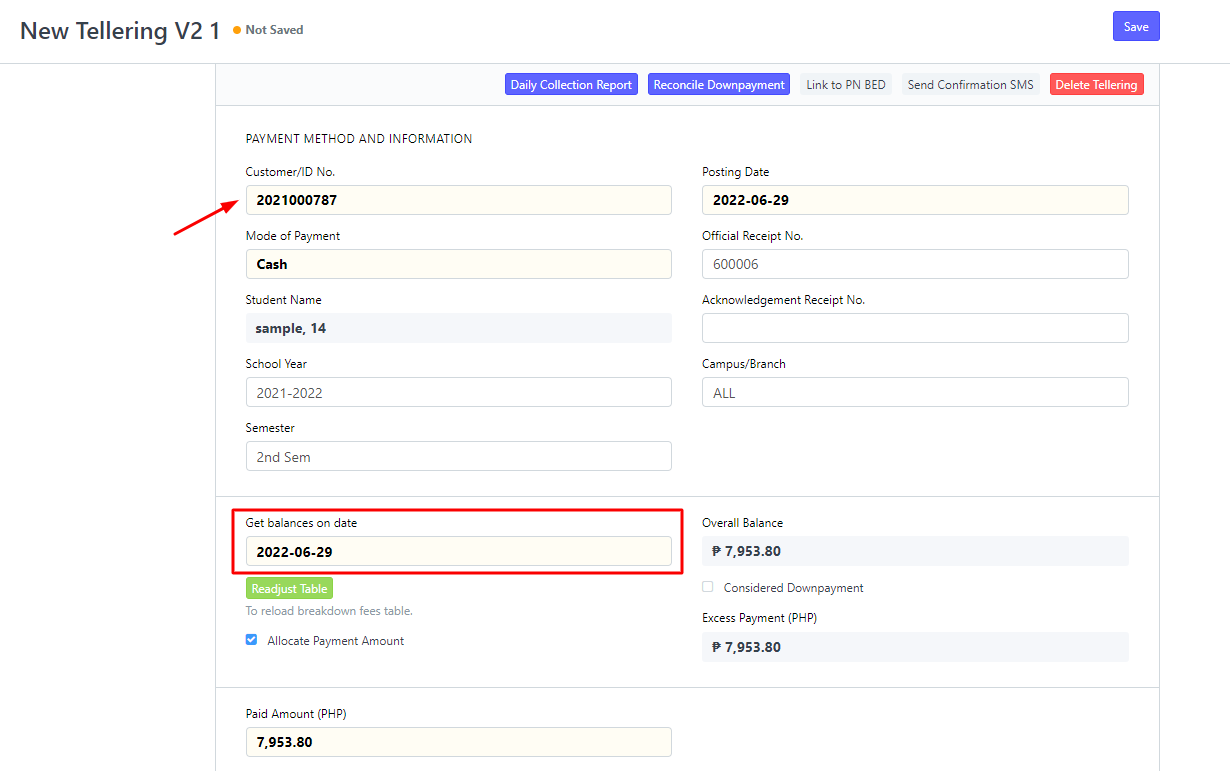
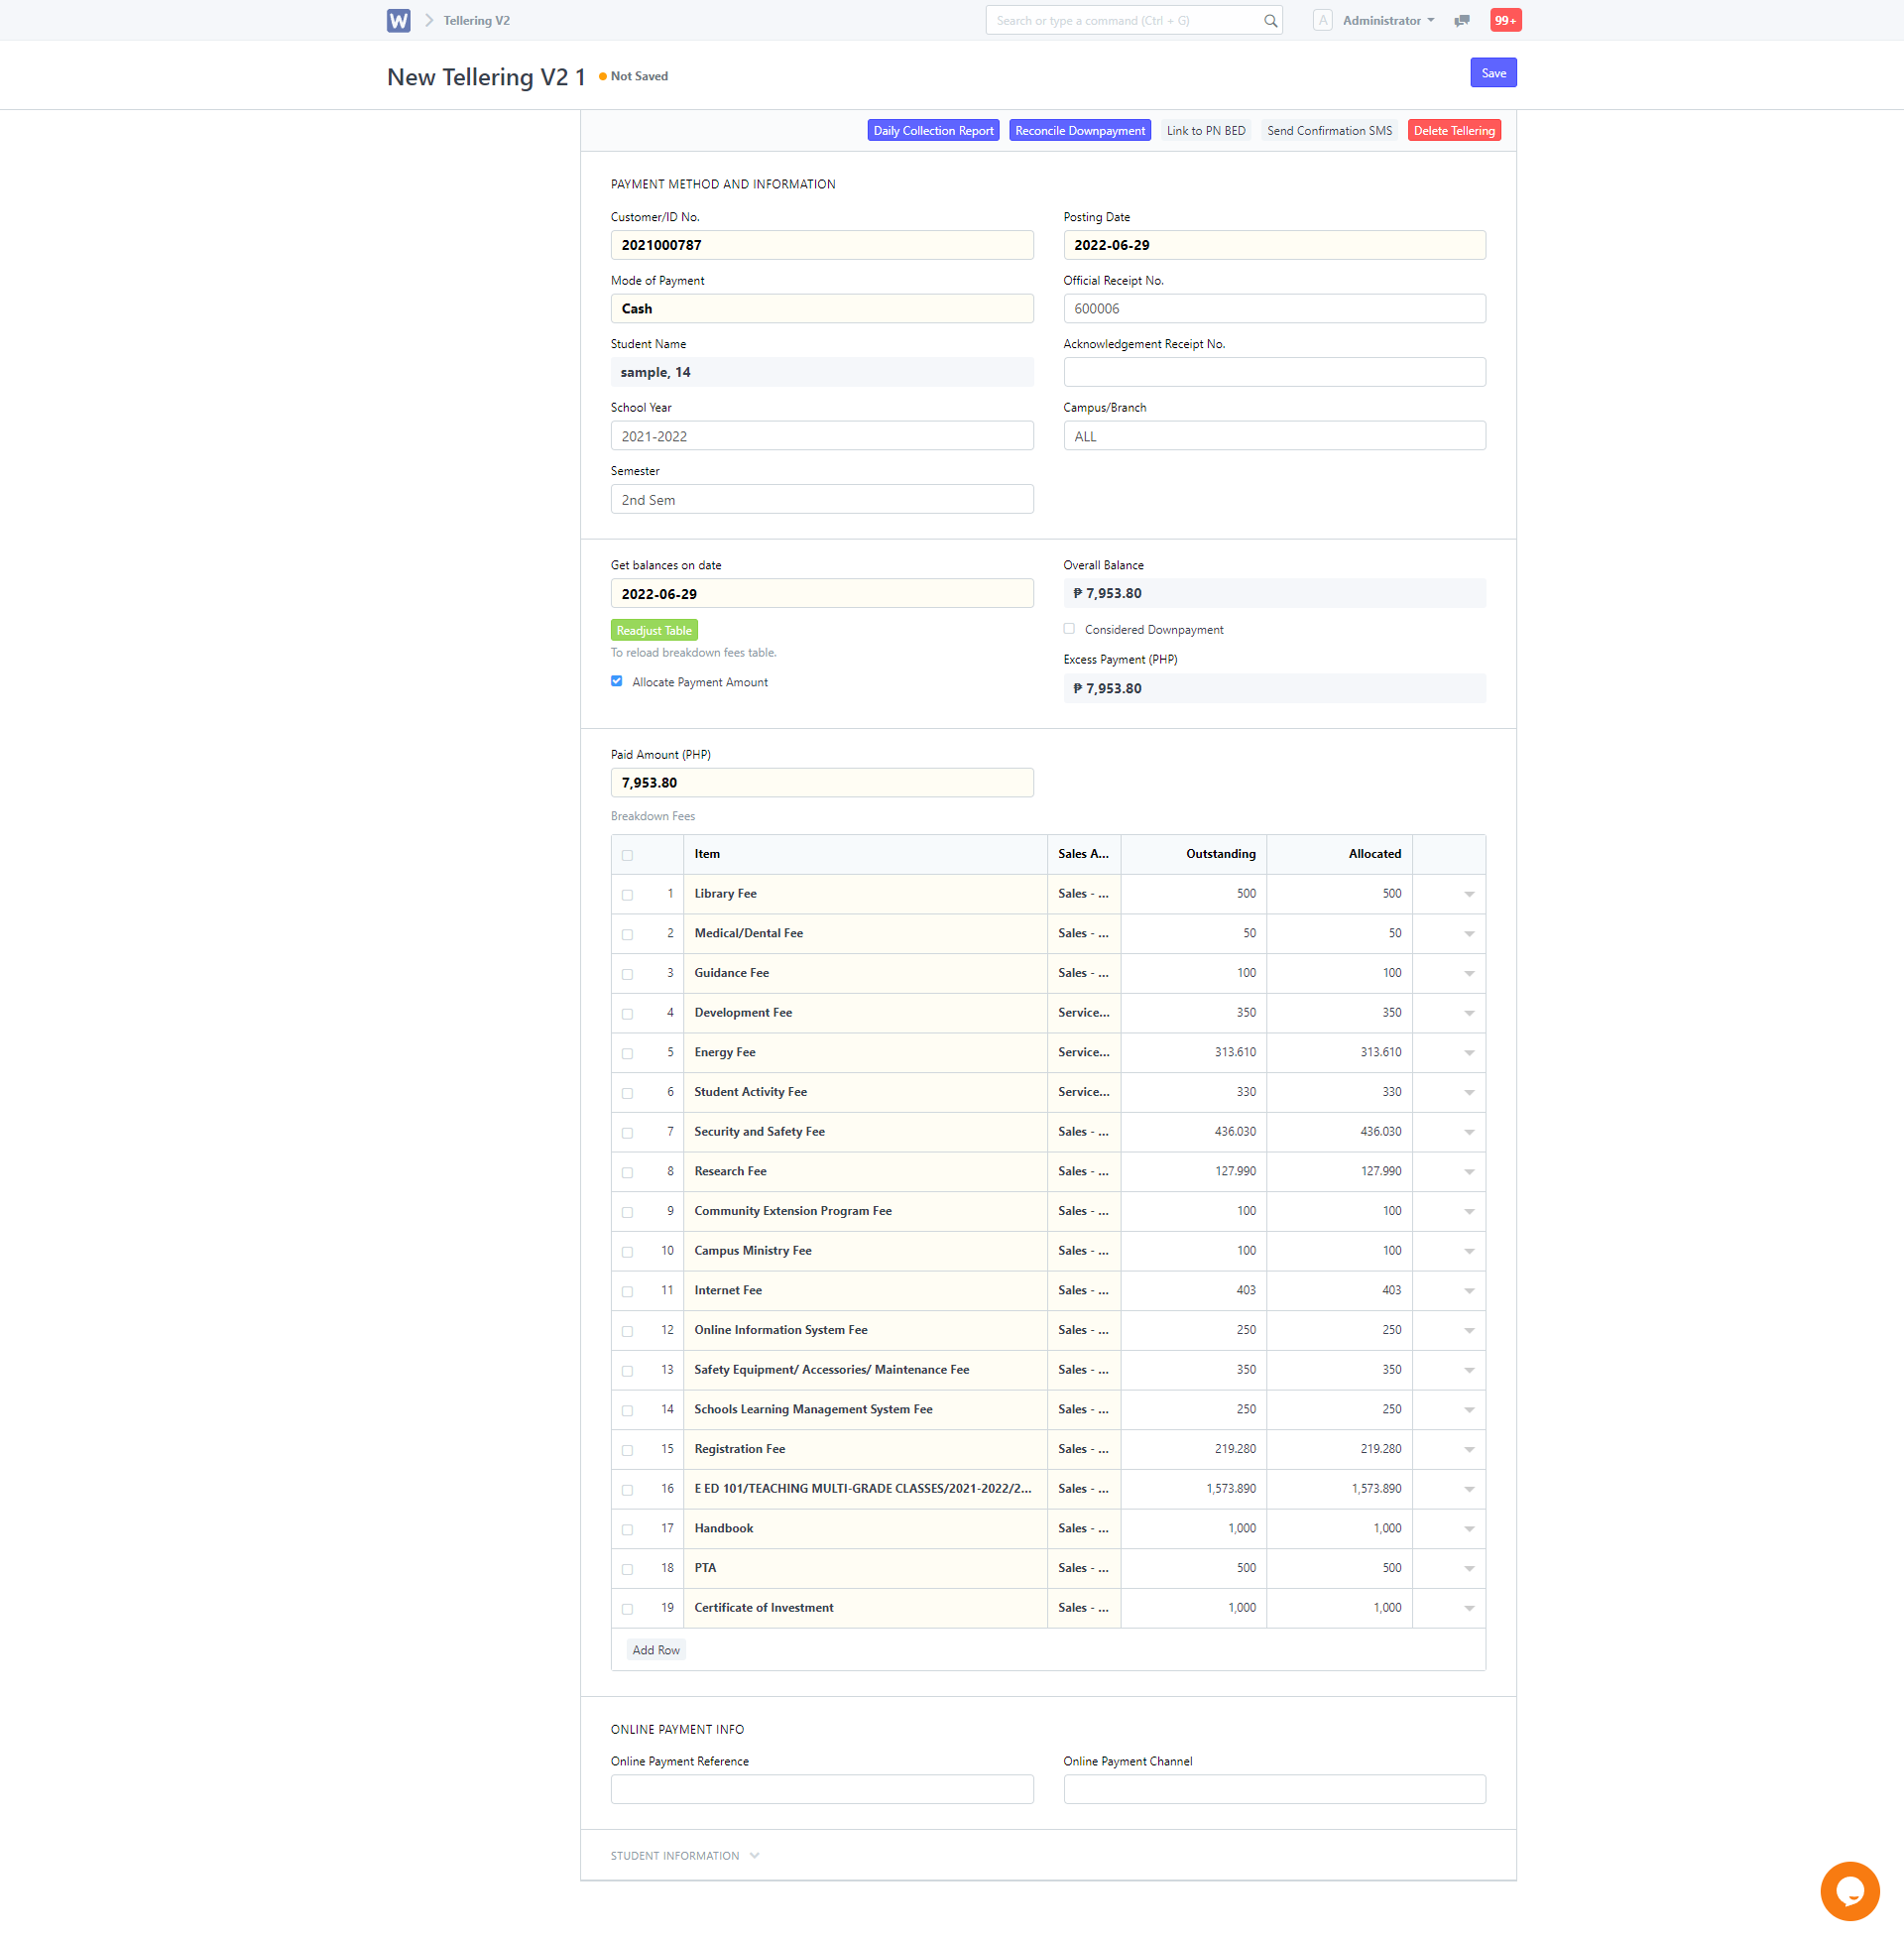
7. In Tellering V2, you just have to provide Student ID number and the other information will automatically load to the form and you can also modify payments based on what is set on balances on date whether its a monthly payment or annual payment etc and the Paid Amount and Overall Balances below will also auto compute based on the date set.
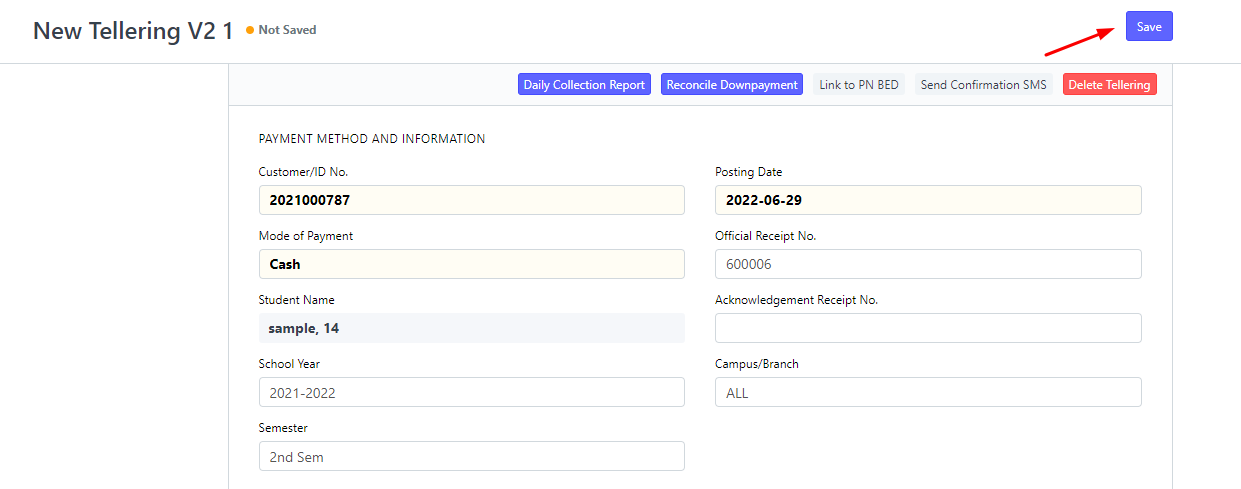
8. Tellering v2 will not require you to submit the form anymore just click Save
9. The Tellering v2 user interface will give you easy access to process payments
Note: Online Payments process has automatically processed Tellering and reallocated payments once you are now in version 2. No need for you to create one.