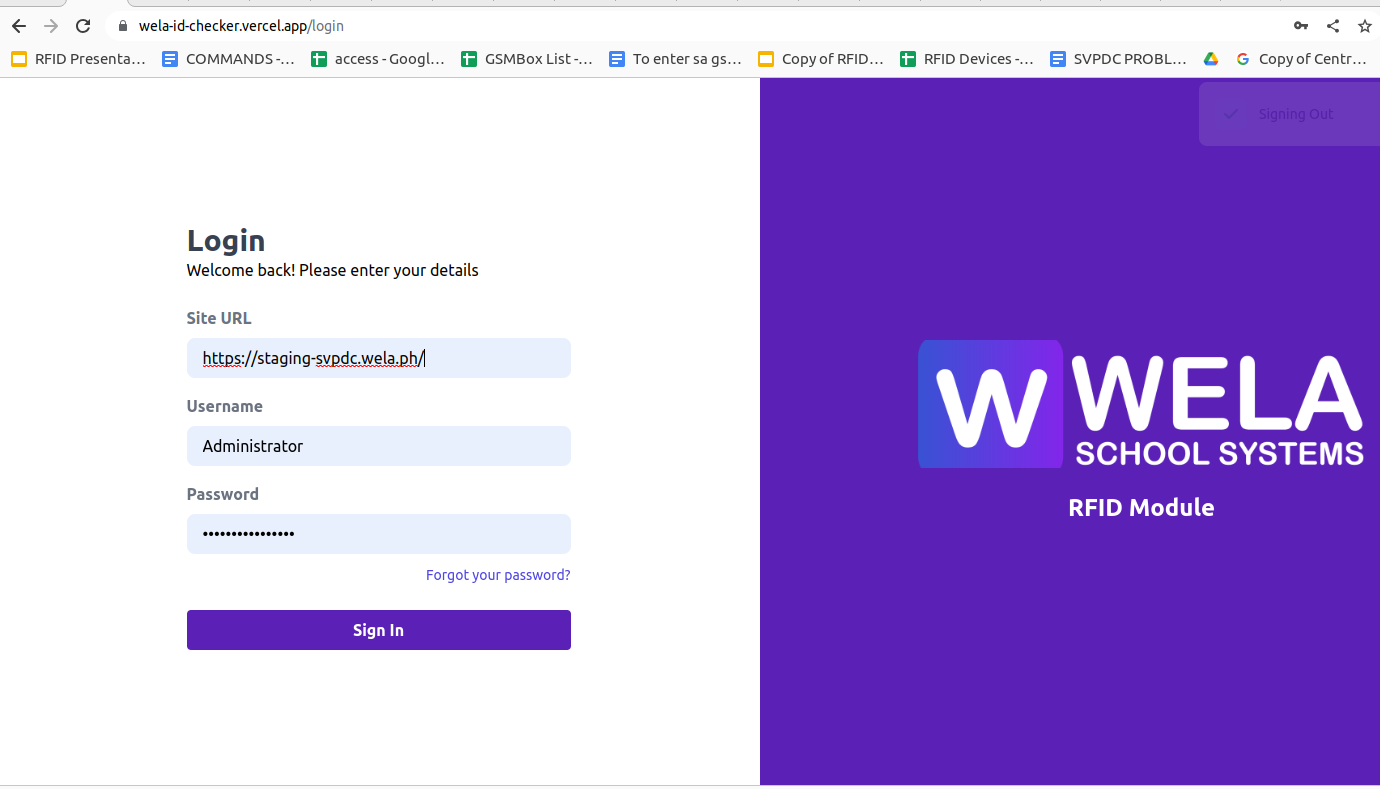
1st Step Go To : https://wela-id-checker.vercel.app/login
Put credentials ( put the credentials on what school you want to open )
Site URL: Example : https://demo.wela.ph/
Username: Administrator
Password: xxx
2nd step:
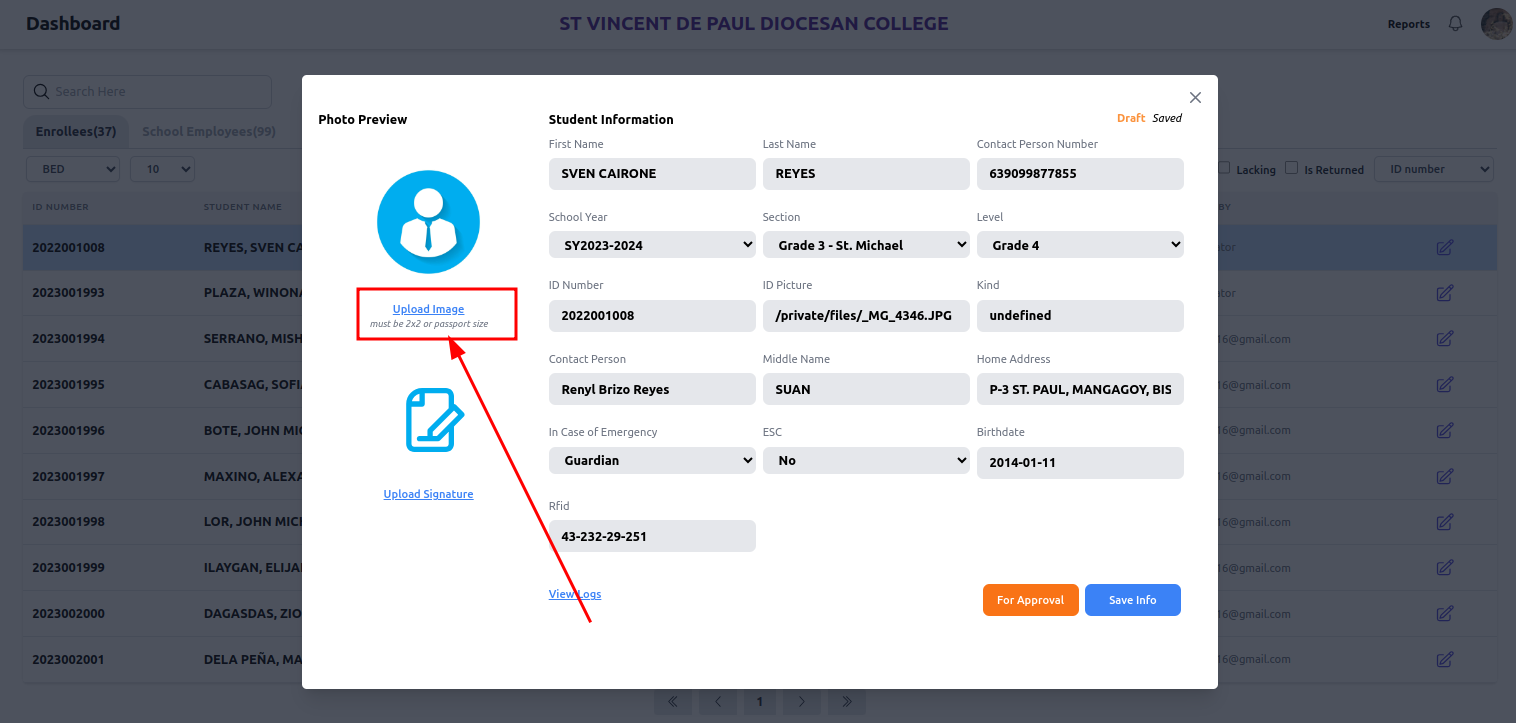
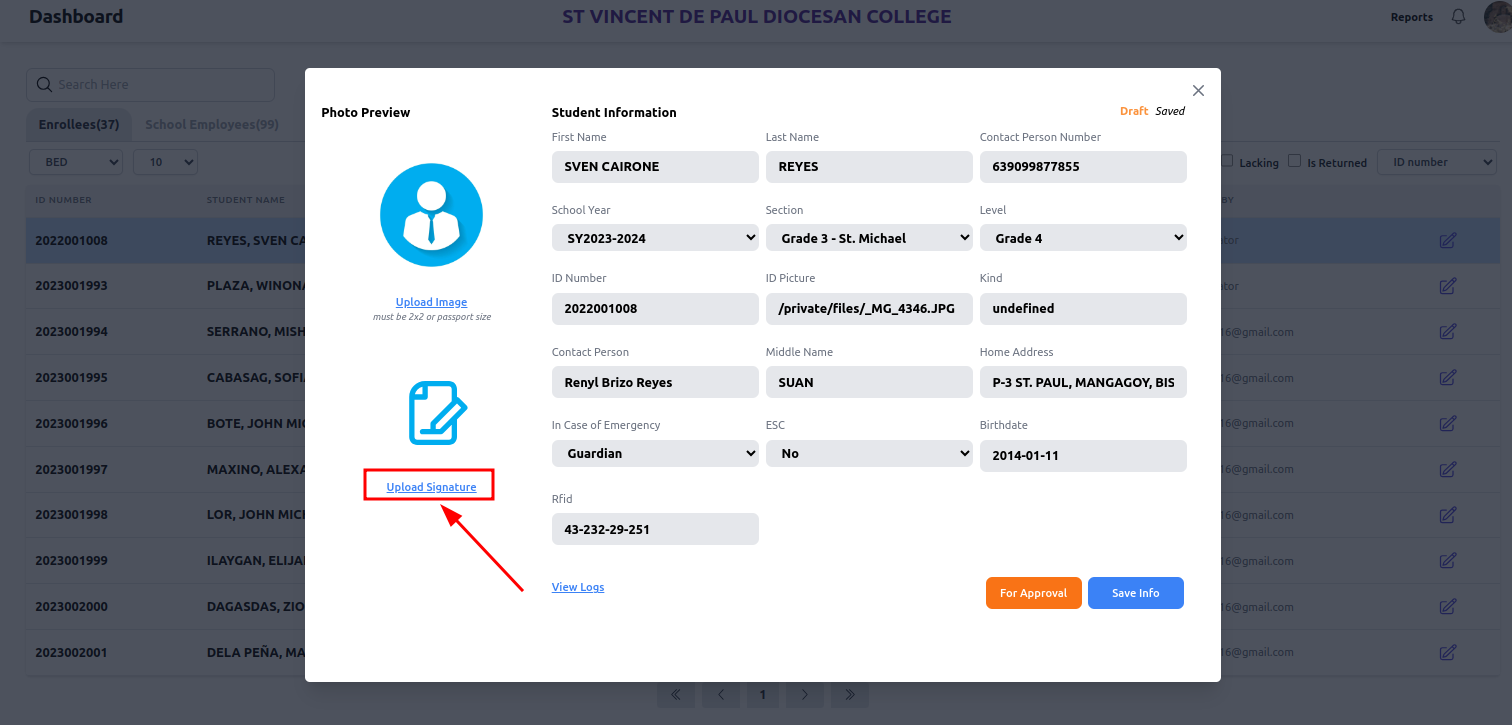
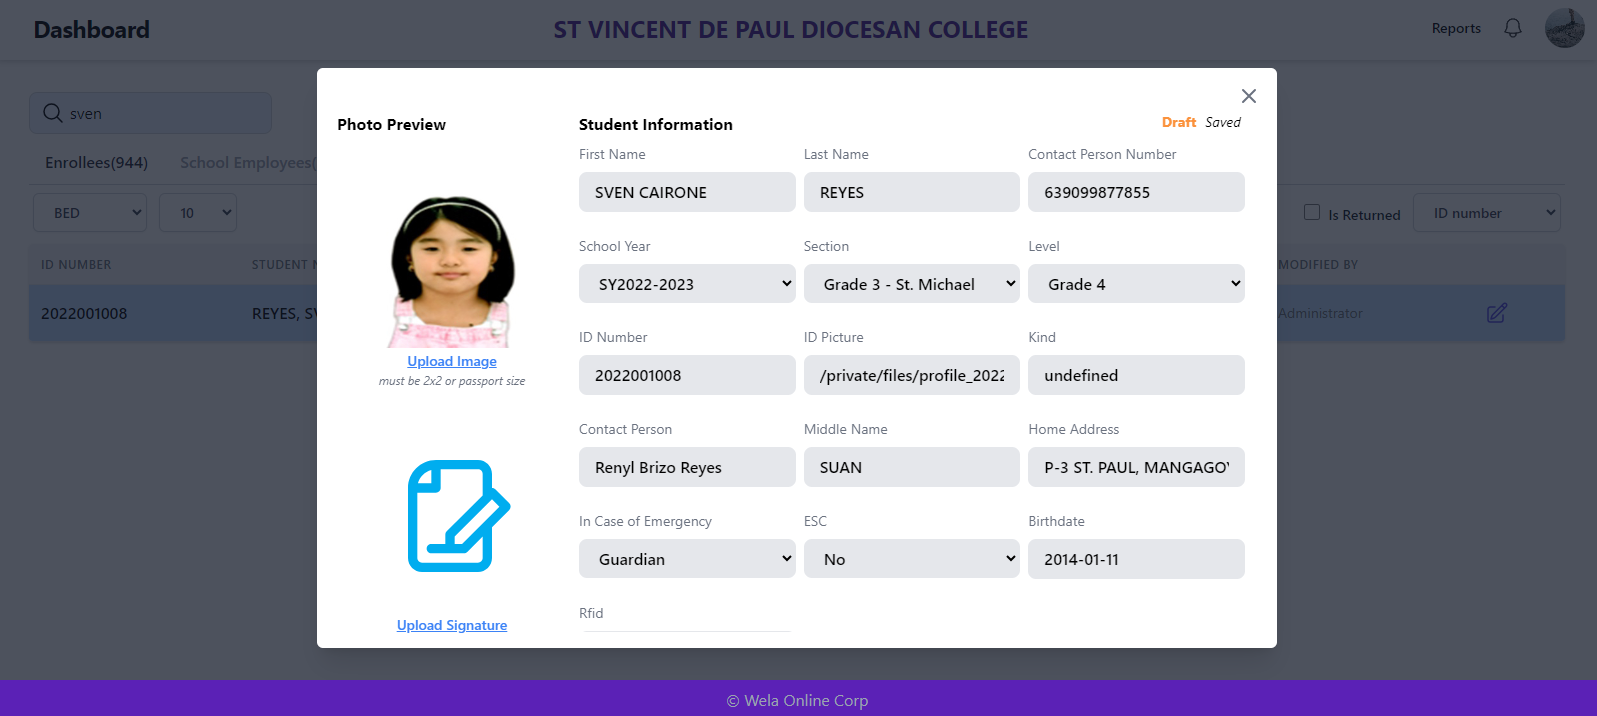
This will show the student details including picture and signature
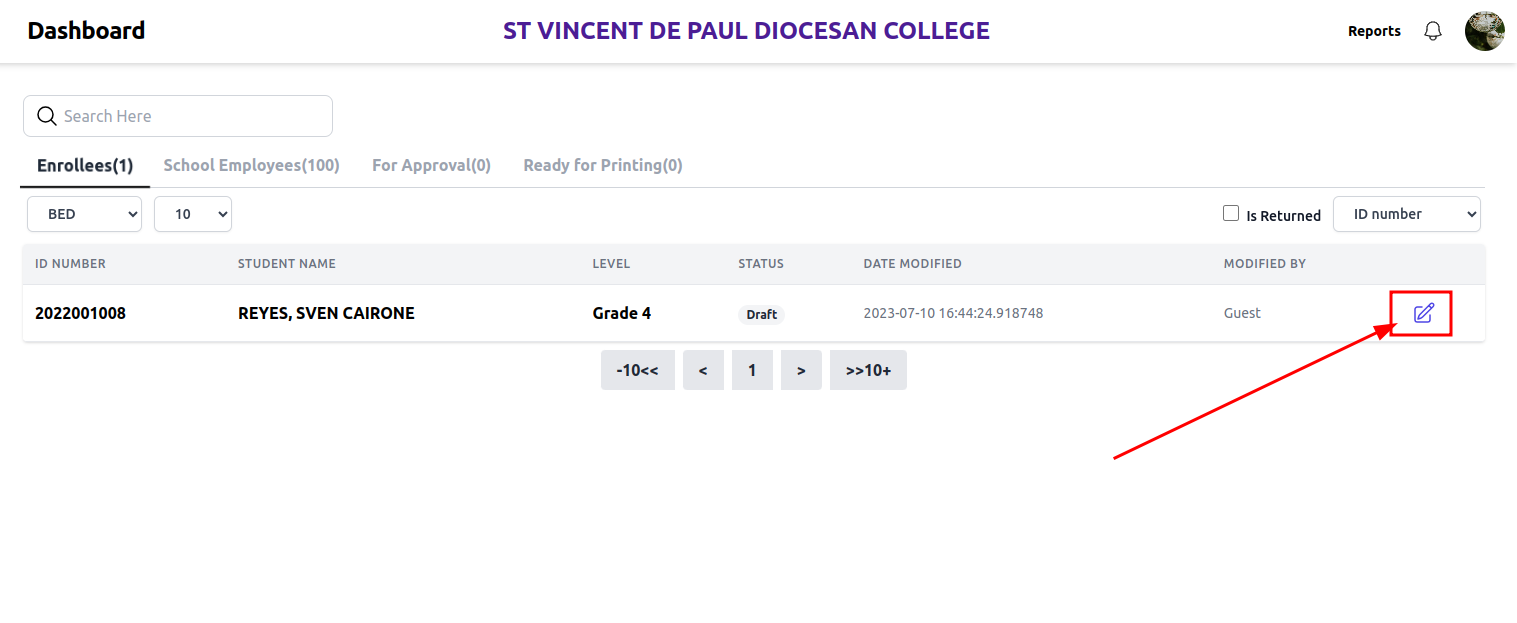
3rd step:
In this step you can choose to edit the details;
- upload signature/picture
- Select Section,Level, In Case of Emergency, etc
After you complete the details > click For Approval
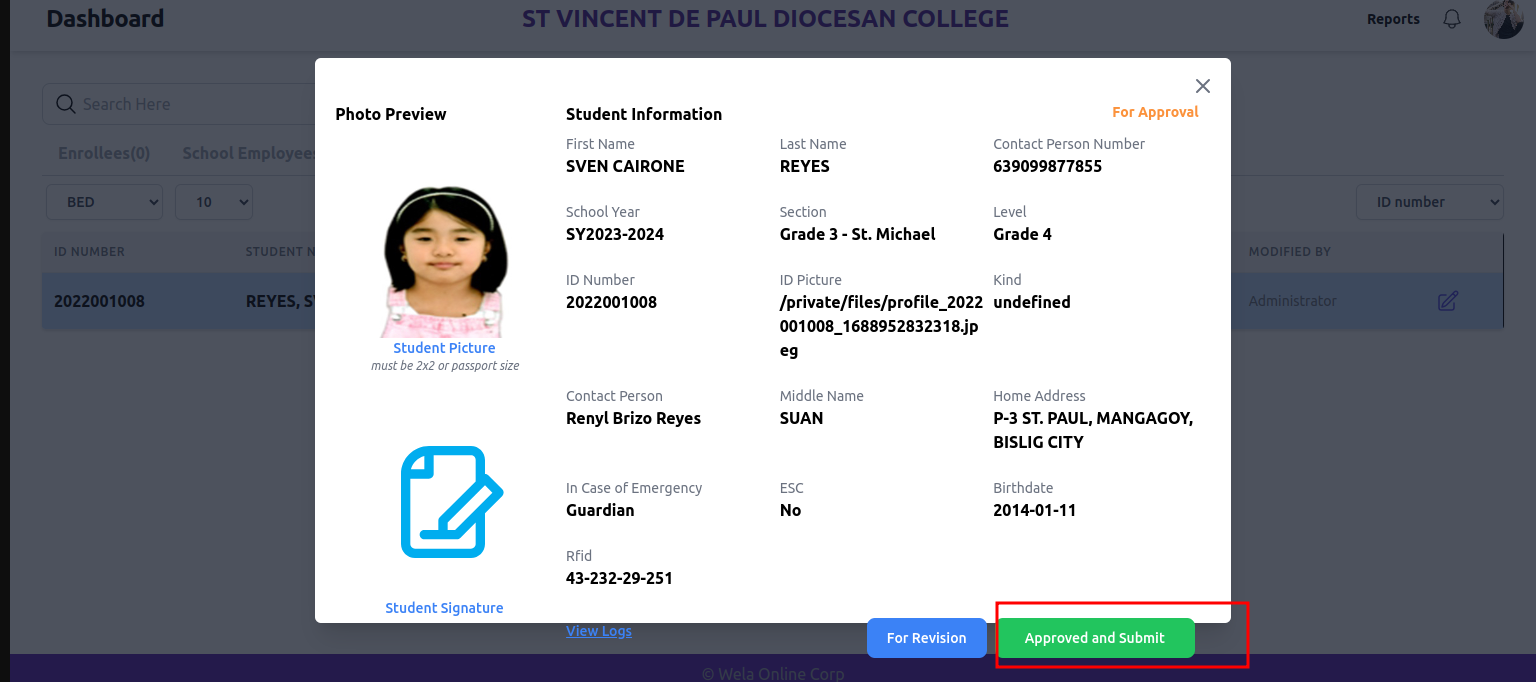
4th step:
Click For Approval - in this section can view the data of the student.
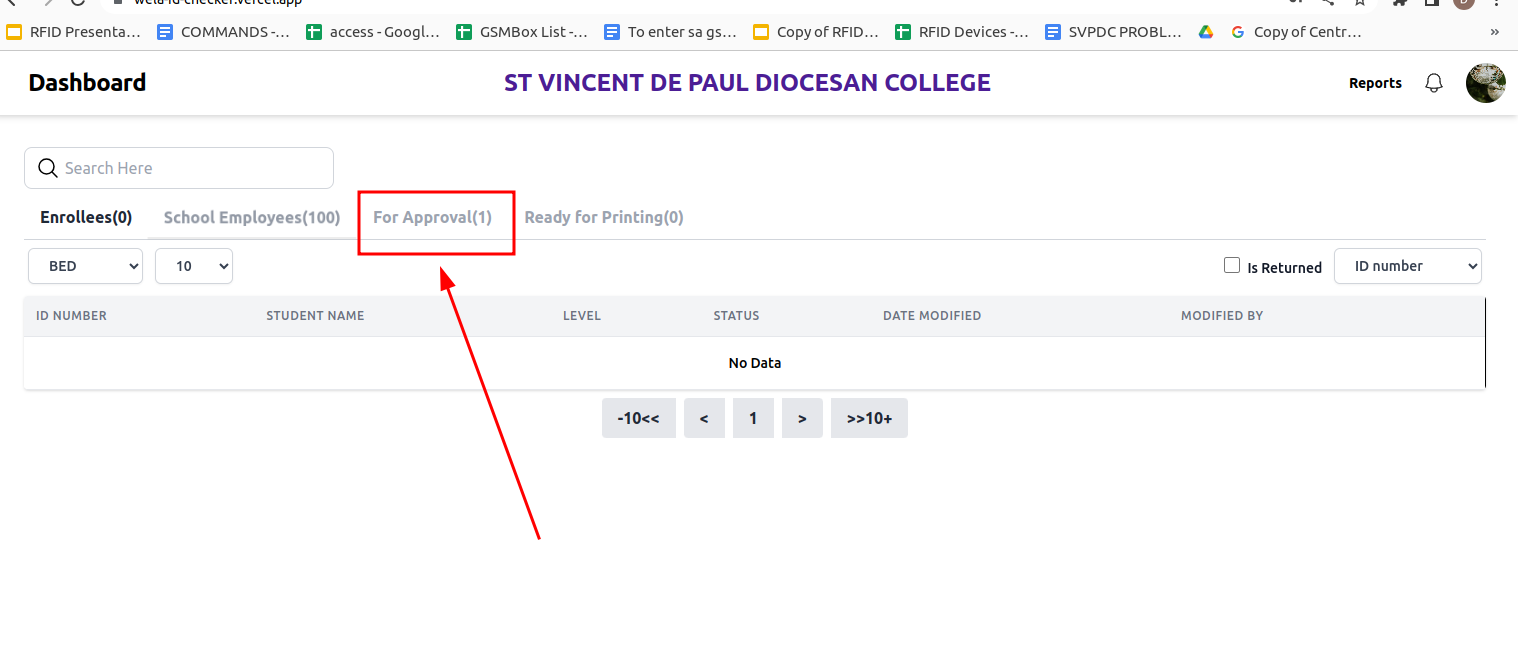
You can click Approved and Submit or For Revision
>click for revision - if there are incorrect data, misspelled spelling or number(it will go back to draft)

If the student data is all correct including the ID picture and signature please click Approved and Submit
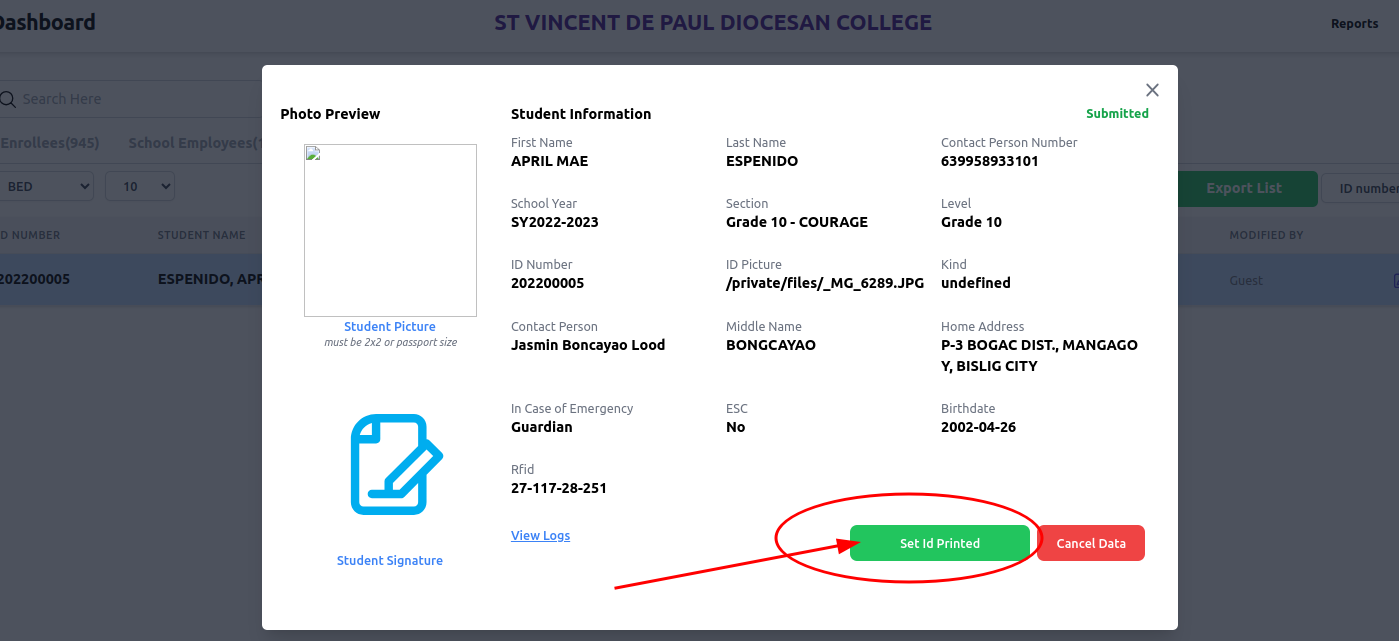
5th step: then go to “READY FOR PRINTING tab” click this icon to set the ID
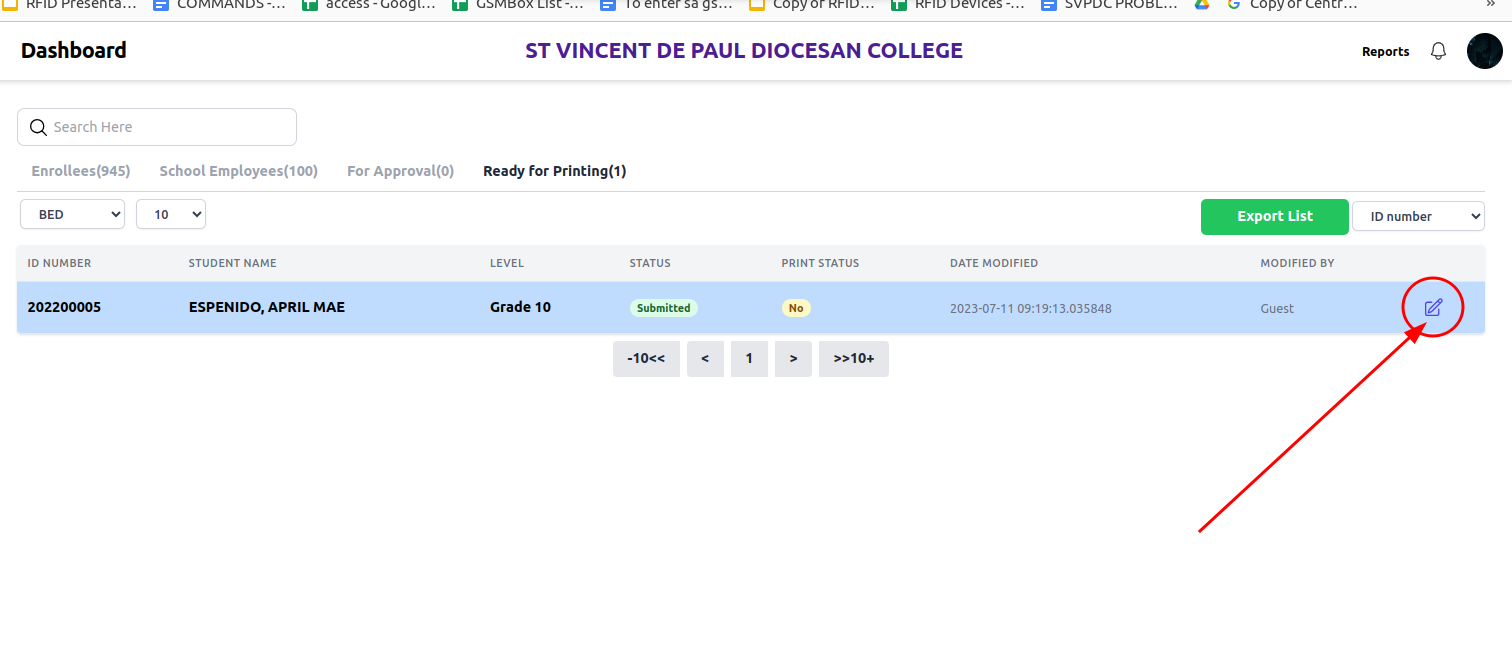
After that click set ID to Printed ( if the ID is all correct and good to go)
If ever corrections may occur you may click “CANCEL DATA”
Then, it will go back to drafts/enrollee list
6th step: Click the “REPORTS” above.
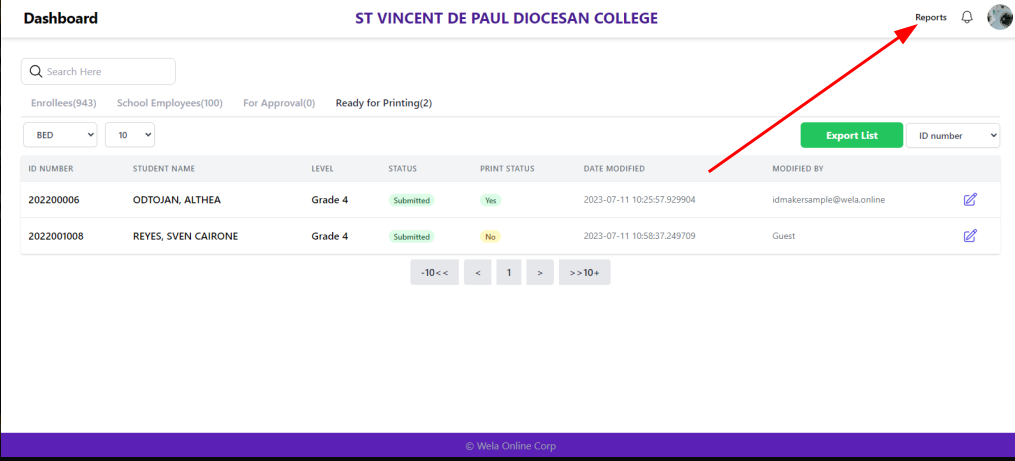
7th step: Here you can see the tabs of “FOR DELIVERY”
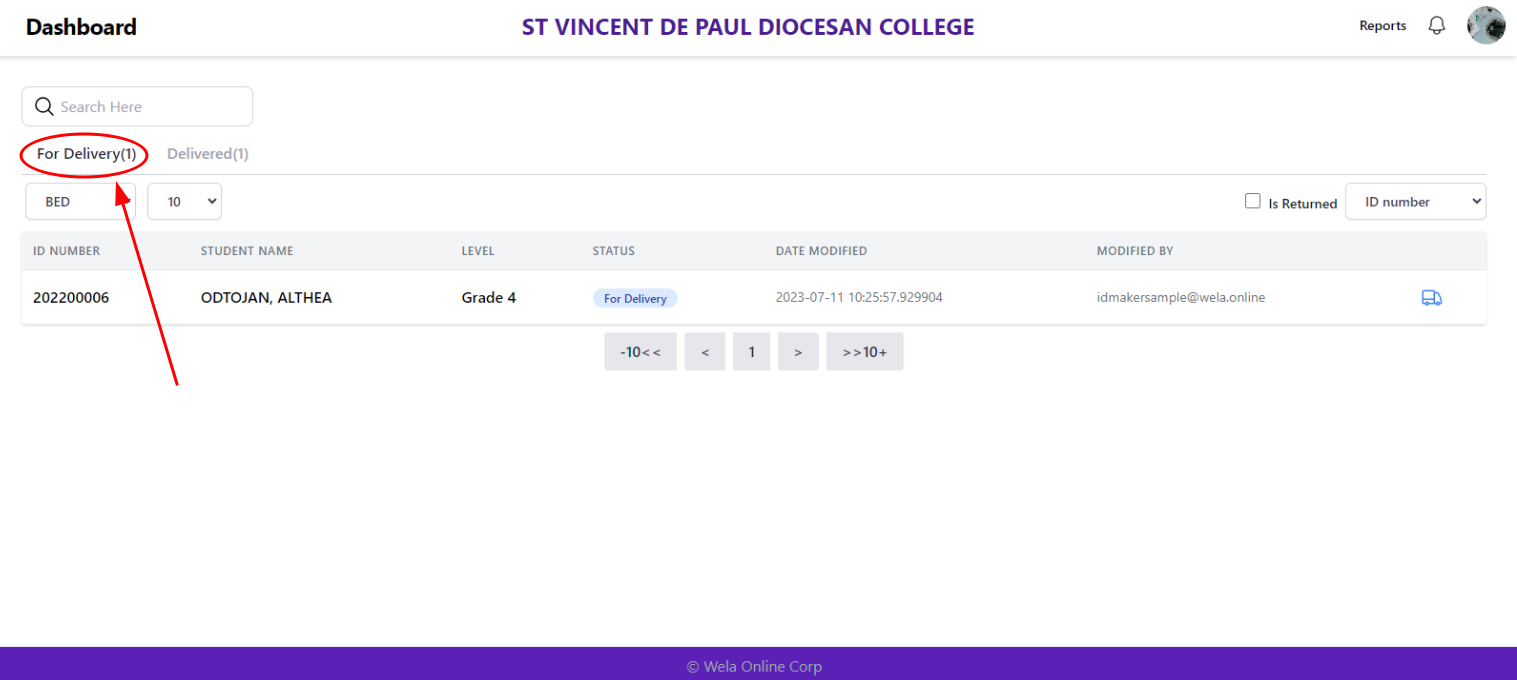
8th step: Click the “DELIVERY TRUCK icon”
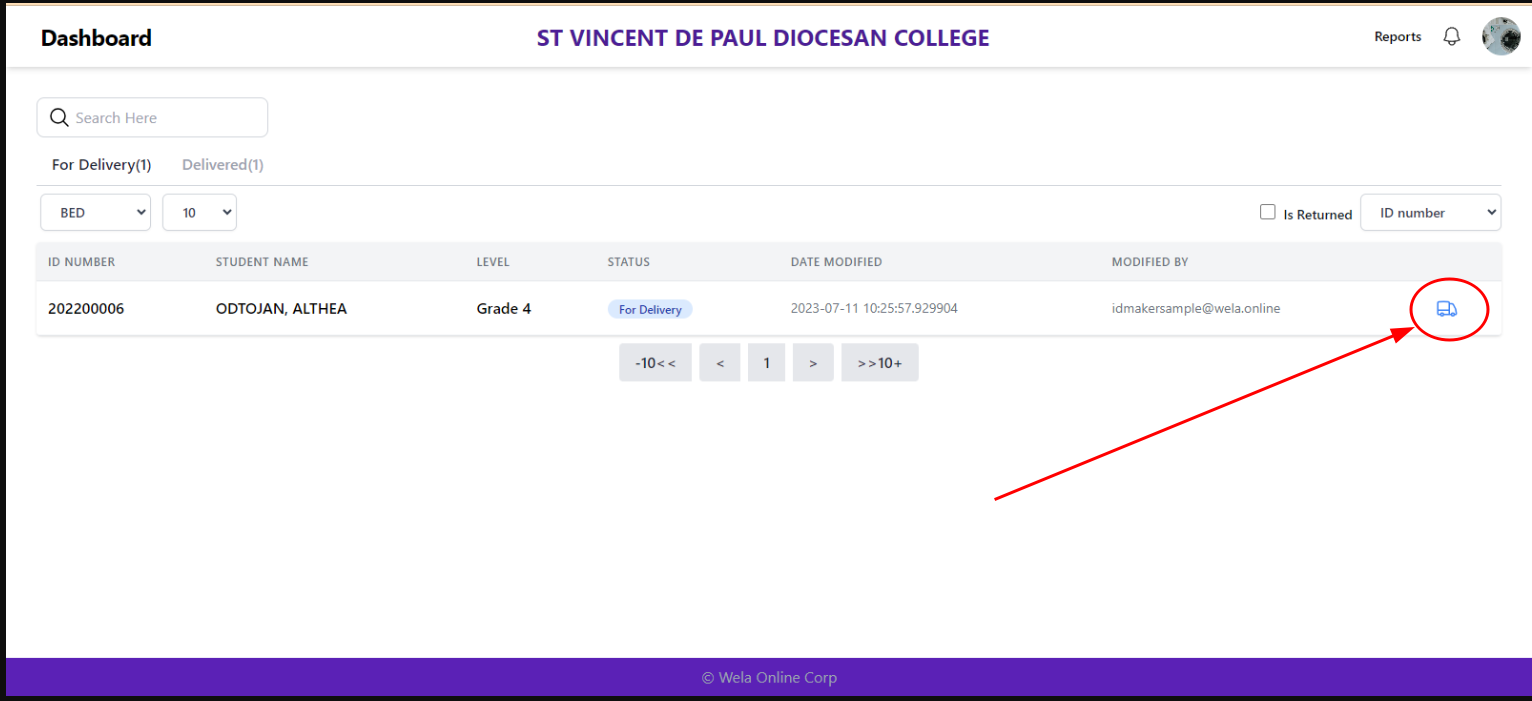
(8.1)
After clicking the delivery truck icon, the preview info will prompt.
You can click the Buttons below.
SET TO REPRINTING - lost ID, damaged or update information
SET TO DRAFT- if there is changes/corrections of the student info
SET TO DELIVERED - if all data are okay and correct, you may proceed to set to delivered
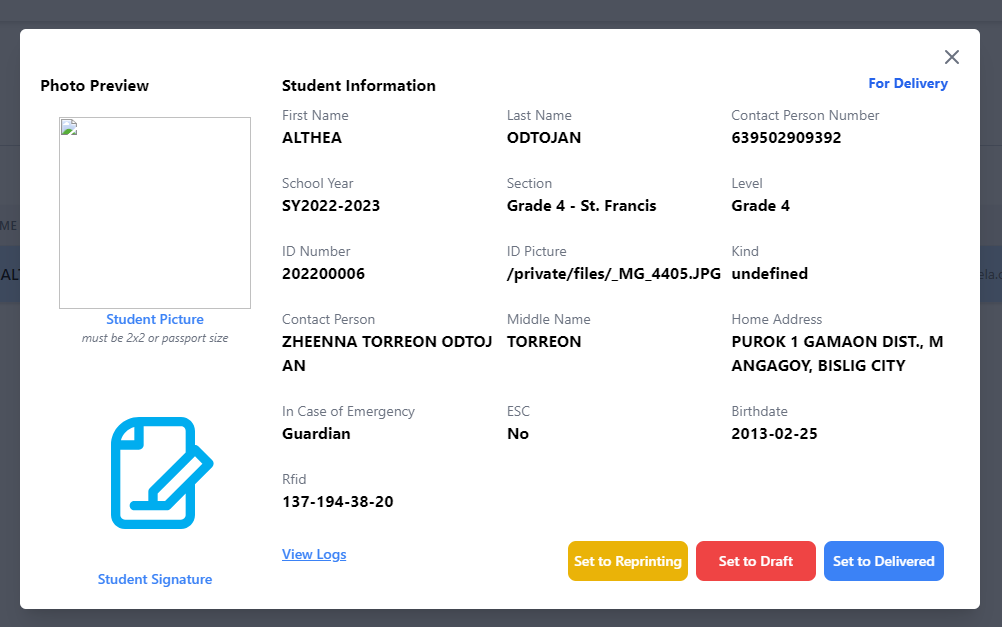
NOTE: if you click SET TO REPRINTING or SET TO DRAFTS - all the information will return to enrollee list and set back to drafts (see 3rd step)
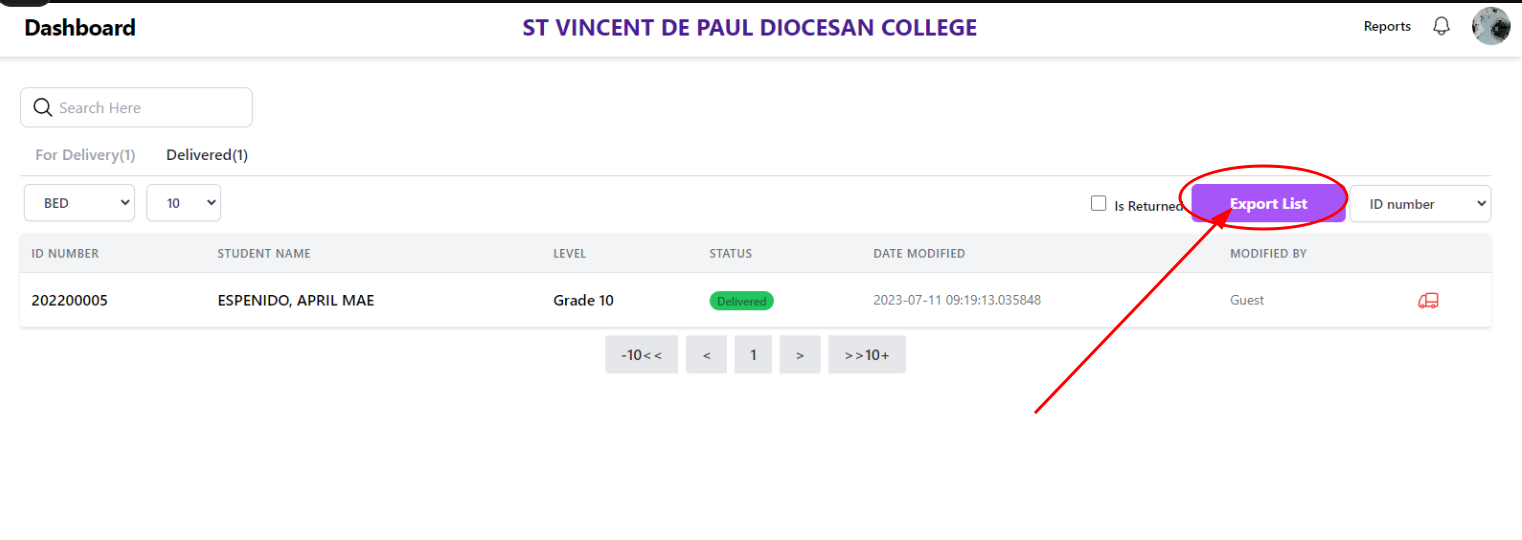
9th step: Click the “DELIVERED tab” to see the delivered ID.

10th step: should you want a list of the delivered IDs, you may click the “EXPORT LIST” button.
The list will be automatically downloaded in excel form.