With the new update, students for K12 / SHS can now receive and request for their account and login to the WELA portal for WELA V2.
These steps below will be the guide on the process in setting up the accounts of K12 / SHS students.
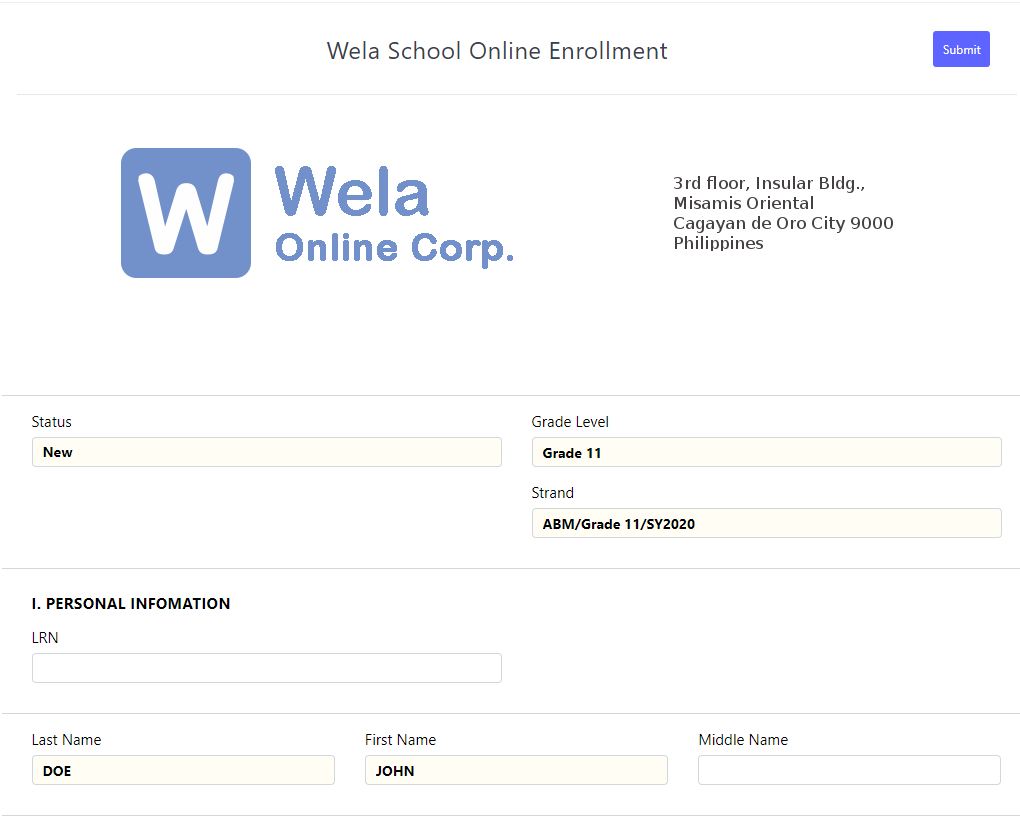
Step 1
Enroll a student for K12 / SHS through the online enrollment form provided to each school. Here is a sample link, https://yourschool.wela.ph/enroll.
Step 2
Login to the portal using the accounts that can evaluate student applications, i.e. Registrar, Coordinator, Administrators, etc.

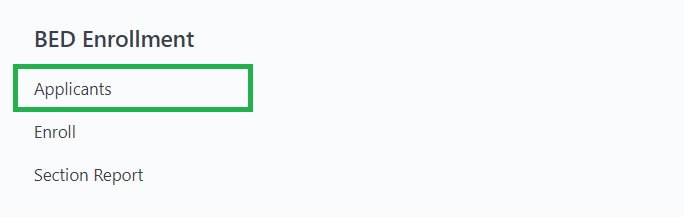
Step 3
Once logged in, proceed to click the Enrollment icon the portal's desk.

Step 4
Select Applicants under BED Enrollment
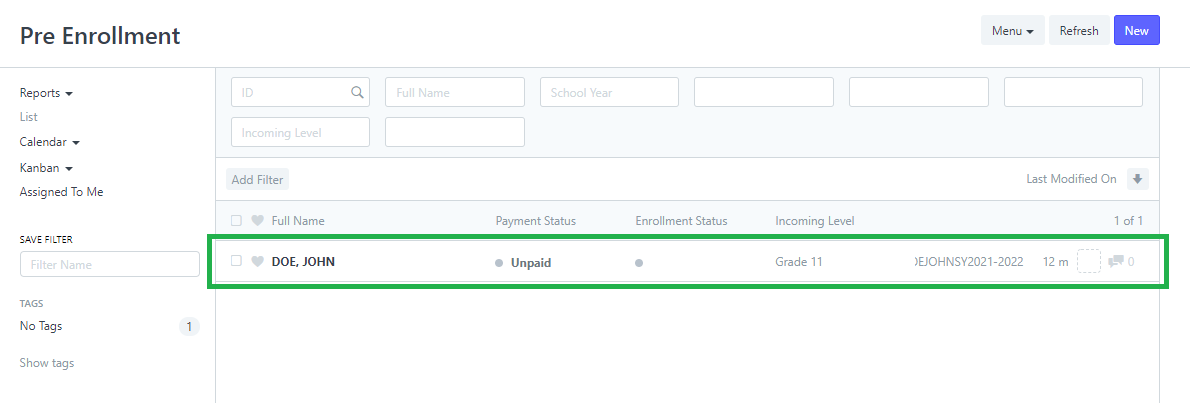
Step 5
After clicking the Applicants, the Pre Enrollment page will be displayed and the student previously enrolled will be shown on the list. Click on the student's name to check the details.
Step 6
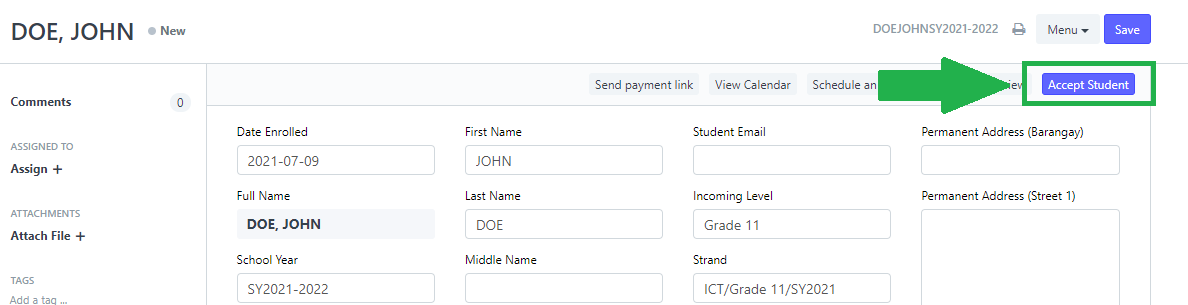
The details of the student will be displayed after clicking the name on the list.
Scroll down to check if the student provided a mobile number.
The mobile number will be used to receive the credentials.
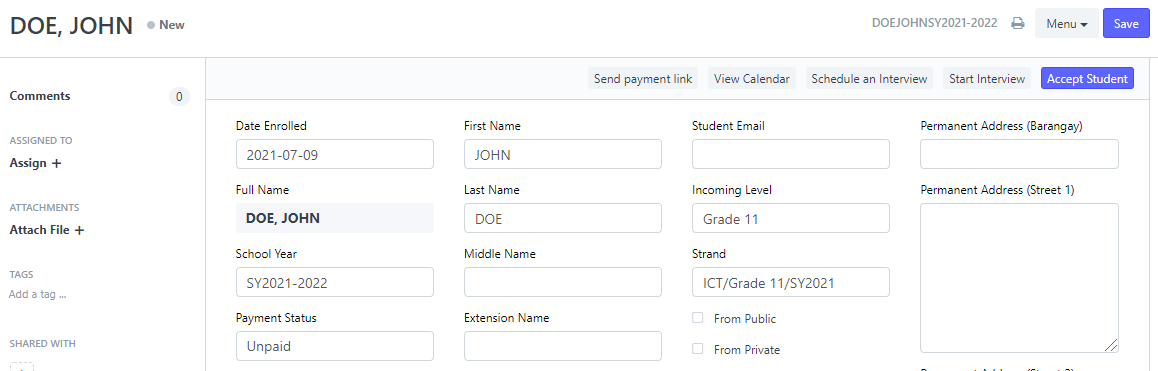

Step 7
After the evaluation of the student's details, proceed now to accept the student by clicking the Accept Student button on the upper right corner.
Step 8
The student will then receive their WELA portal account once the Accept Student button is clicked.
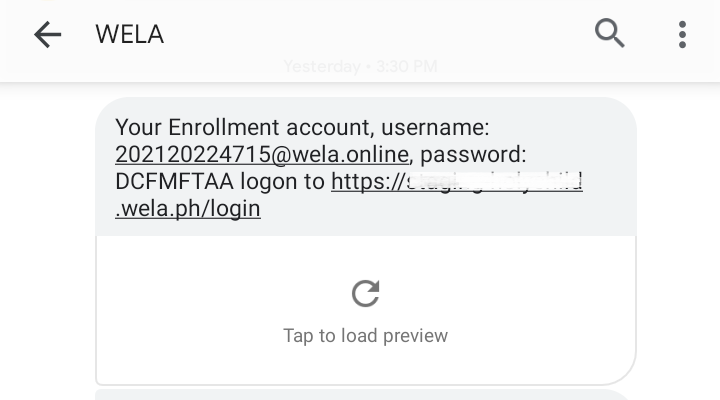
The student now can proceed to login to the portal.
Click here to Resend Portal Accounts for Kinder to Grade 12.