Exporting the Template
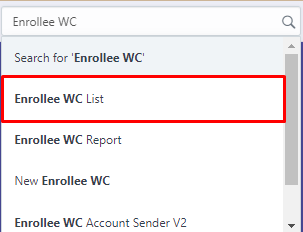
Go to Enrollee WC List
2. Click the “Menu” button. After clicking, click the “Import” button.

3. Next, click the “New” button and the “Download Template”.

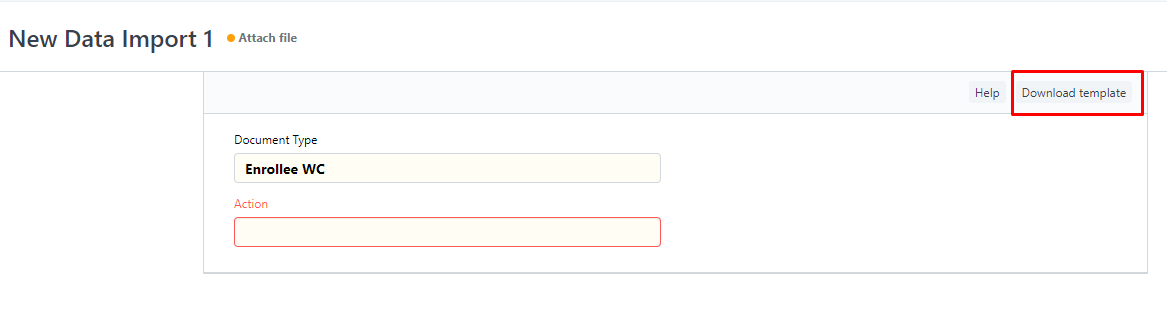
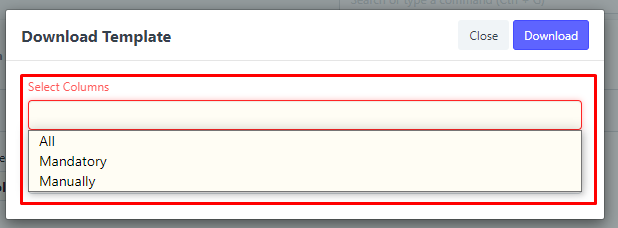
4. Select Column for the template you want to export.
5. Then hit the “Download” button. A template file will be downloaded to your computer.

6. Start inputting the data.
Setting Up before Importing
Setup for Not Sending the Student's Account
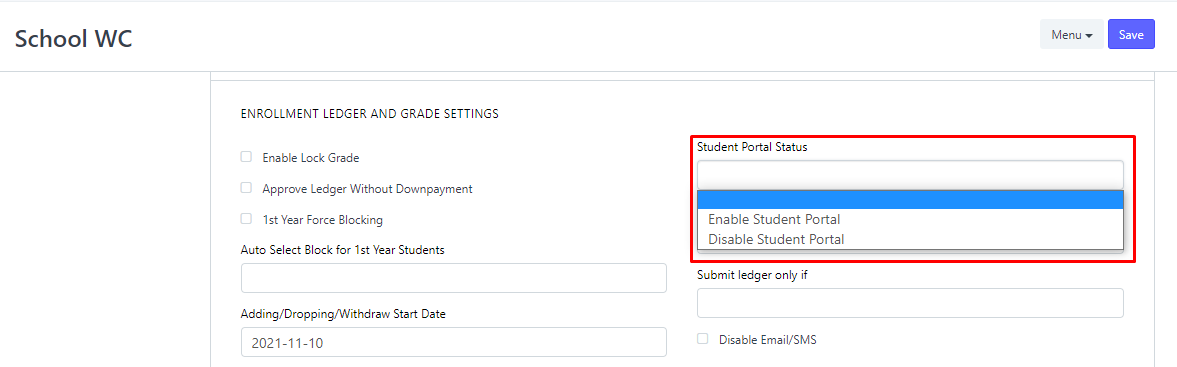
- Go to School WC

2. Disable the “Student Portal Status” and check the “Enable Sending Account”.
Purpose : Not to send accounts to students after importing.
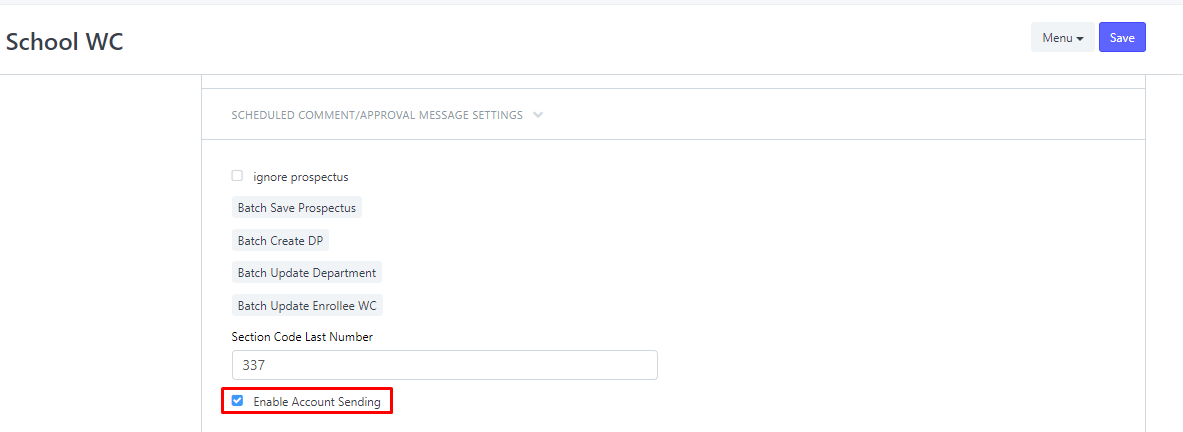
3. All are setup
Setup for Sending the Student's Account
- Go to School WC
2. Enable the “Student Portal Status” and check the “Enable Sending Account”.
Purpose : To send accounts to students after importing.
3. All are setup.
Importing the Data
- Go to Enrollee WC List
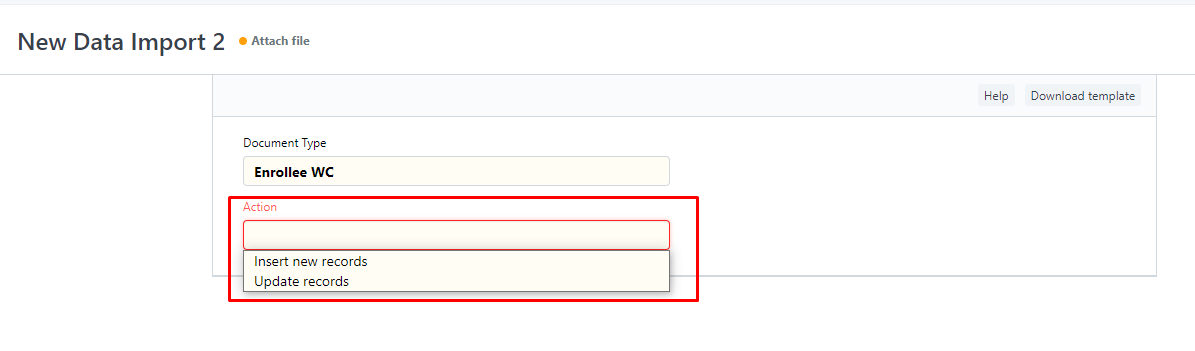
2. Click the “Menu” button. After clicking, click the “Import” button.
3. Next, click the “New” button.
4. Click the “Insert new records”.
5. Attach the file and click the “Start” button to import the data.

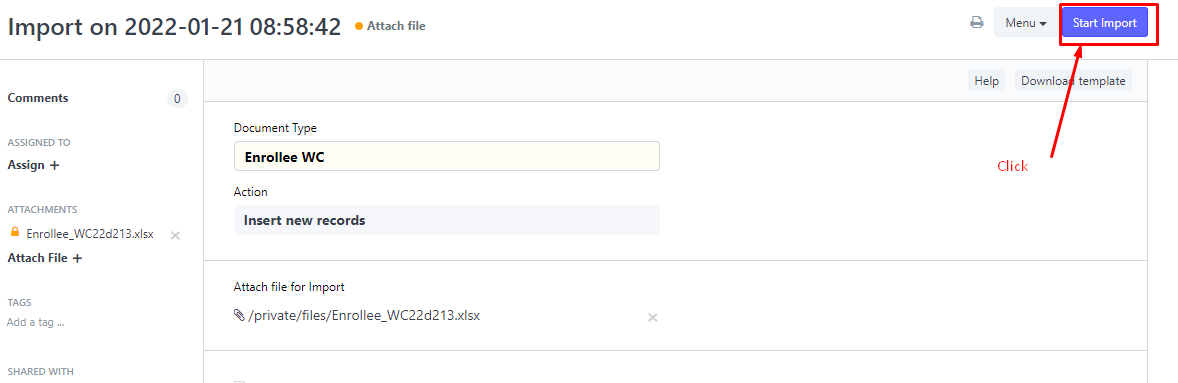
6. Data are now migrated in the system.