Follow these steps below.
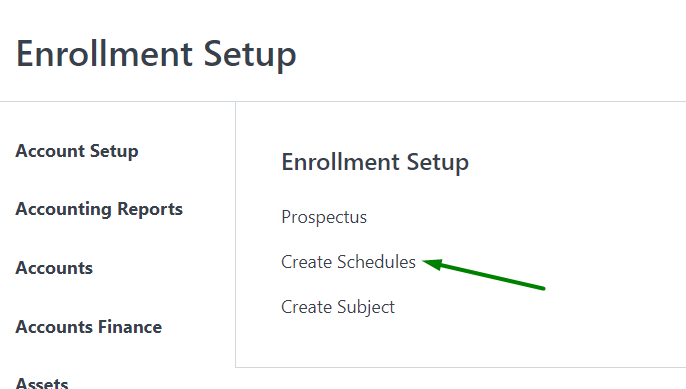
Step 1. Click Enrollment Setup

Step 2. Click Create Schedules
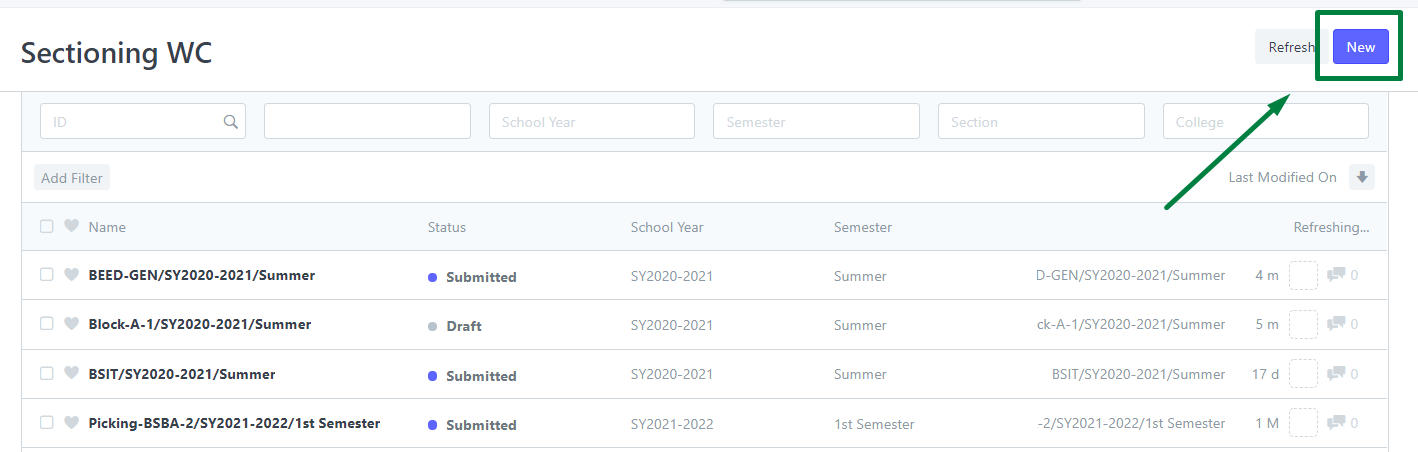
Step 3. Create a new section by clicking New.
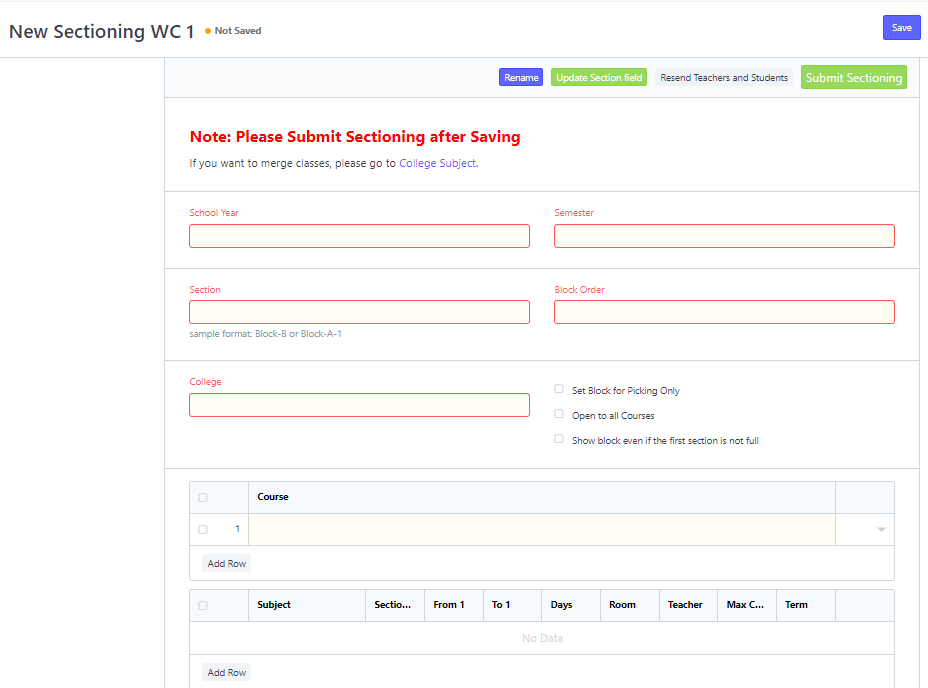
Step 4. Enter the details of the section, course, and subjects.
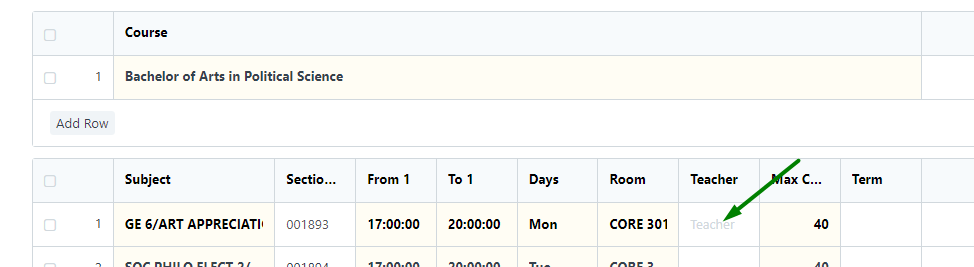
Step 5. Once the subjects are entered, add the instructor.
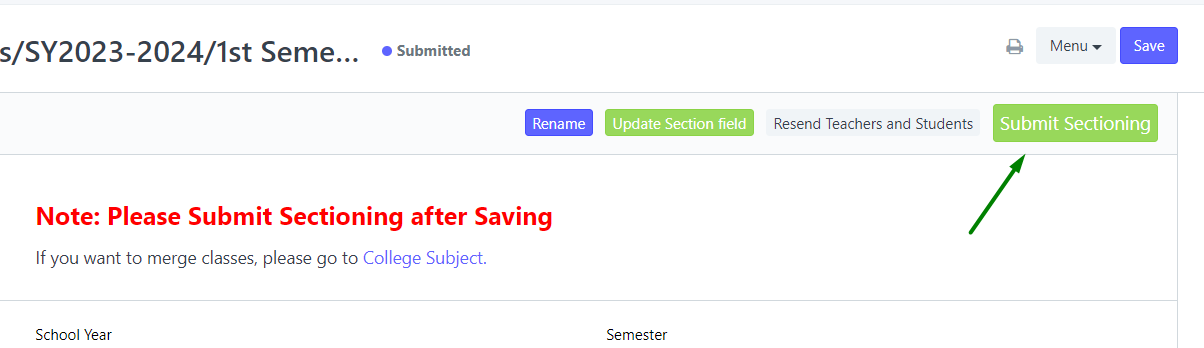
Step 6. Save and Submit the section by clicking the Submit Sectioning Button.
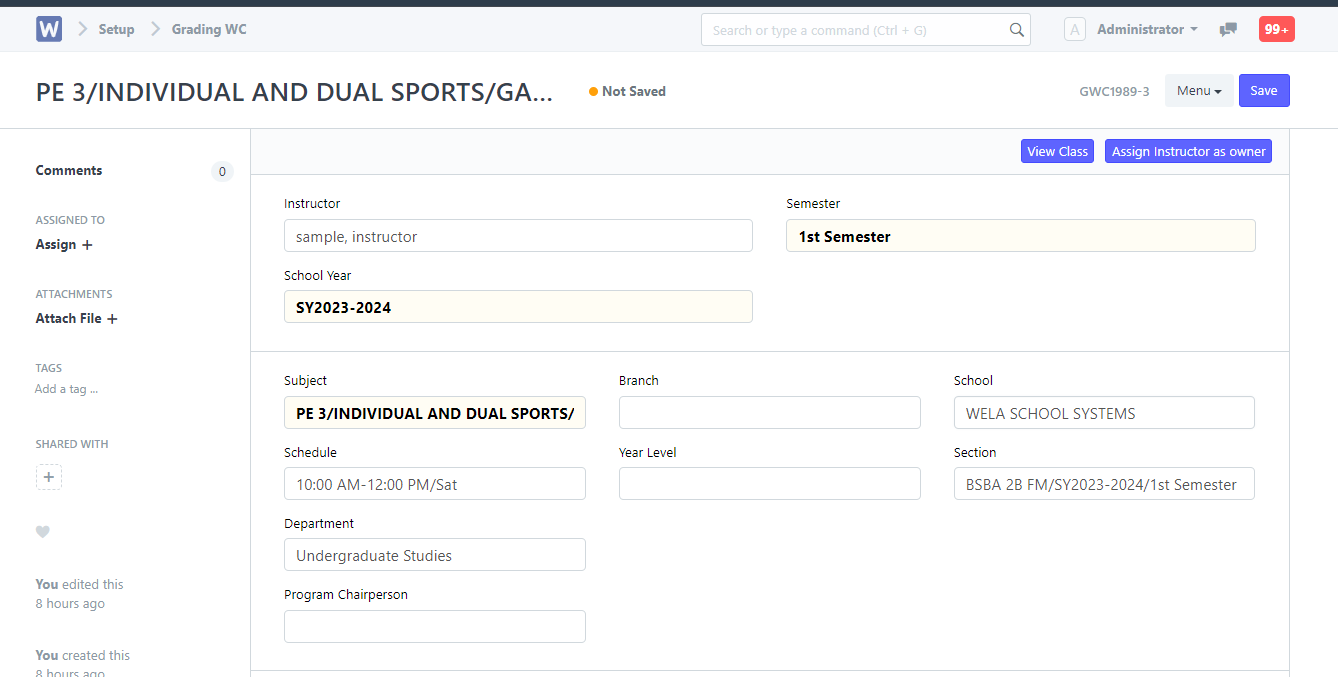
Step 7. Go to Grading WC. You will then see the draft for Grading WC and the students enrolled in that subject.
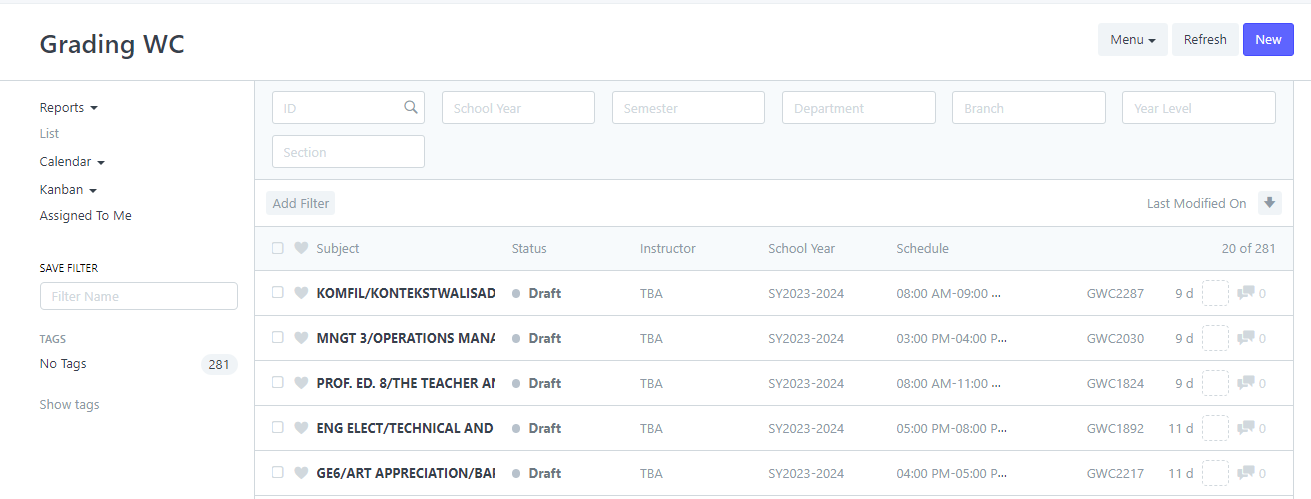
Note: Once there is a submitted Enrollment ledger, it will have an automatic draft/update on Grading WC.