HOW TO SETUP
Step 1: Go to School Settings icon
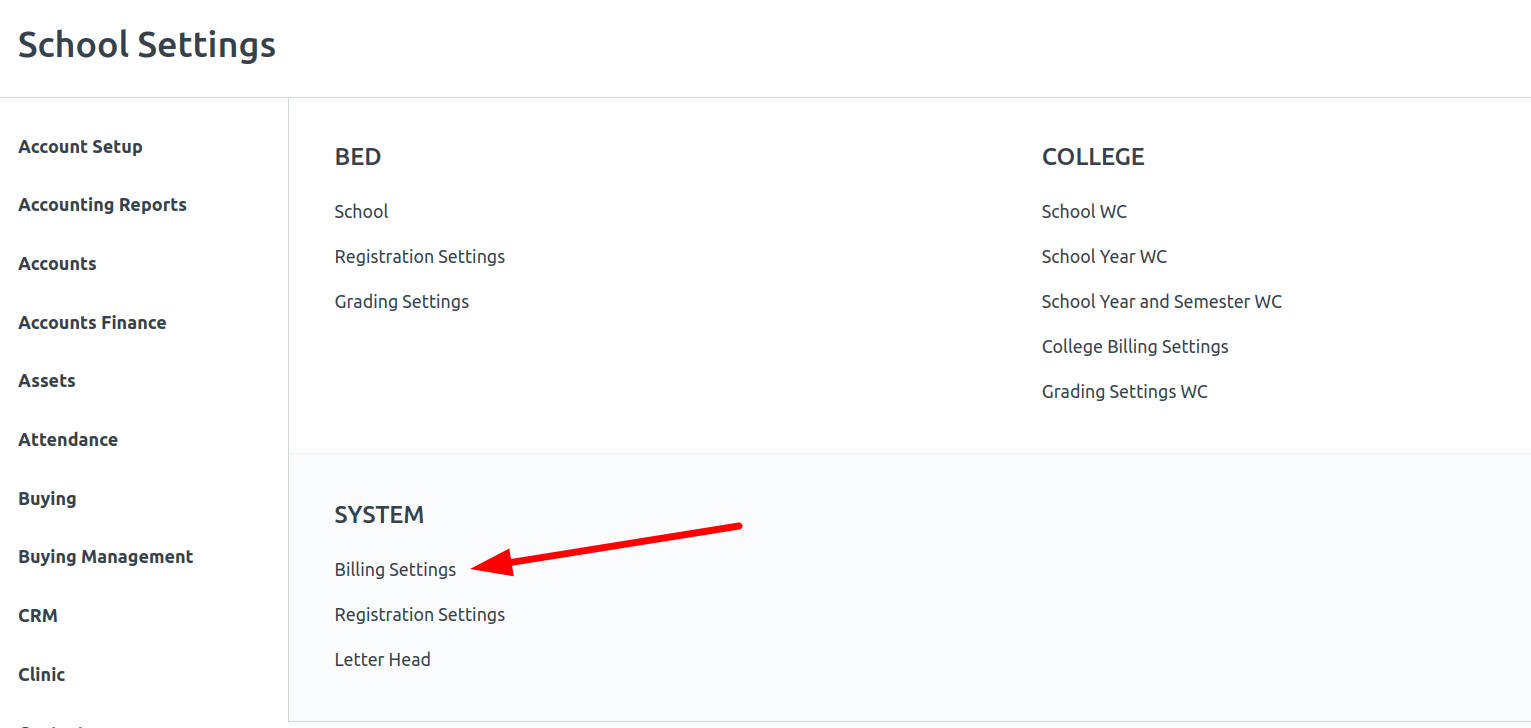
Step 2: Click Billing Settings
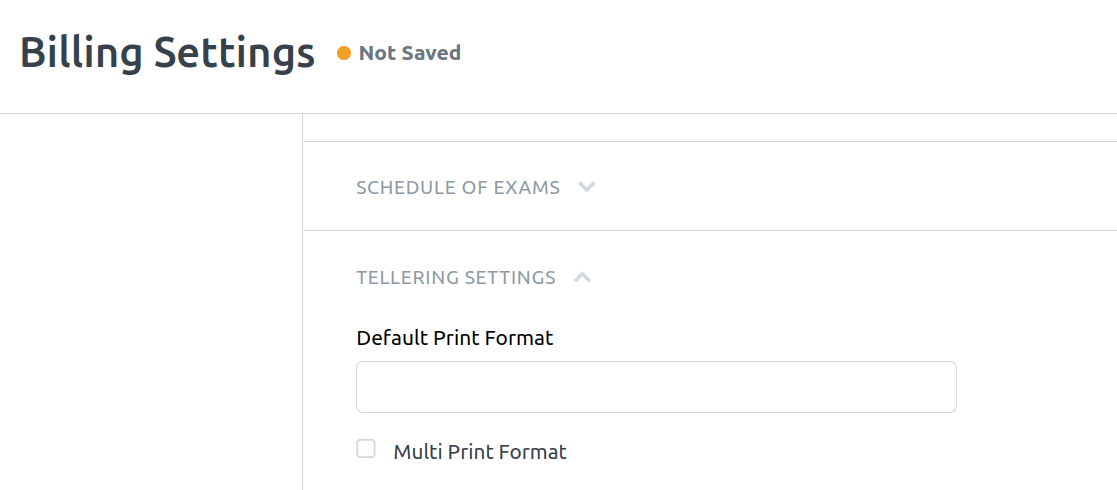
Step 3: Go to Tellering Settings, choose Default Print Format or Multi Print Format and click Save
- Default Print Format - input the default OR Format of your school (1 Official Receipt Format only)
- Multi Print Format - If your school uses different OR formats, tick the box.
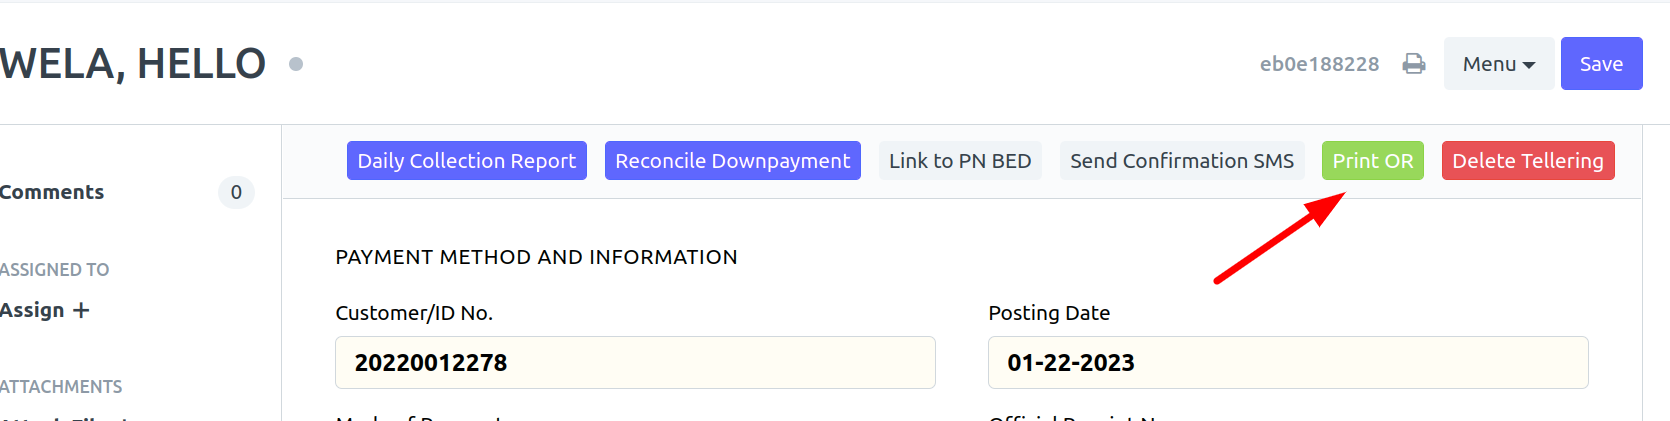
HOW TO USE
- Go to Tellering V2 icon
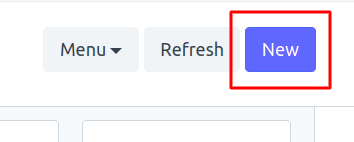
- Click New button
- input Student Name/ID number and Paid Amount then click Save
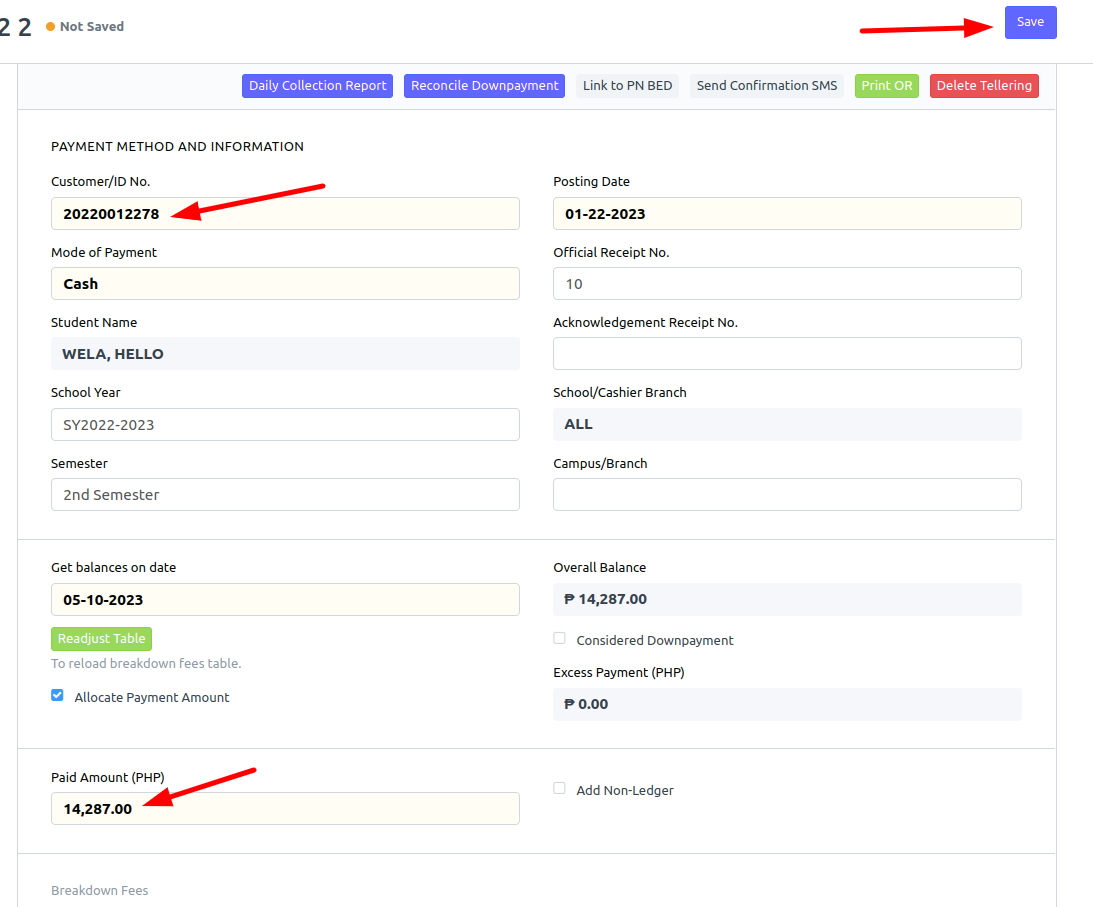
- Click Print OR to print the receipt